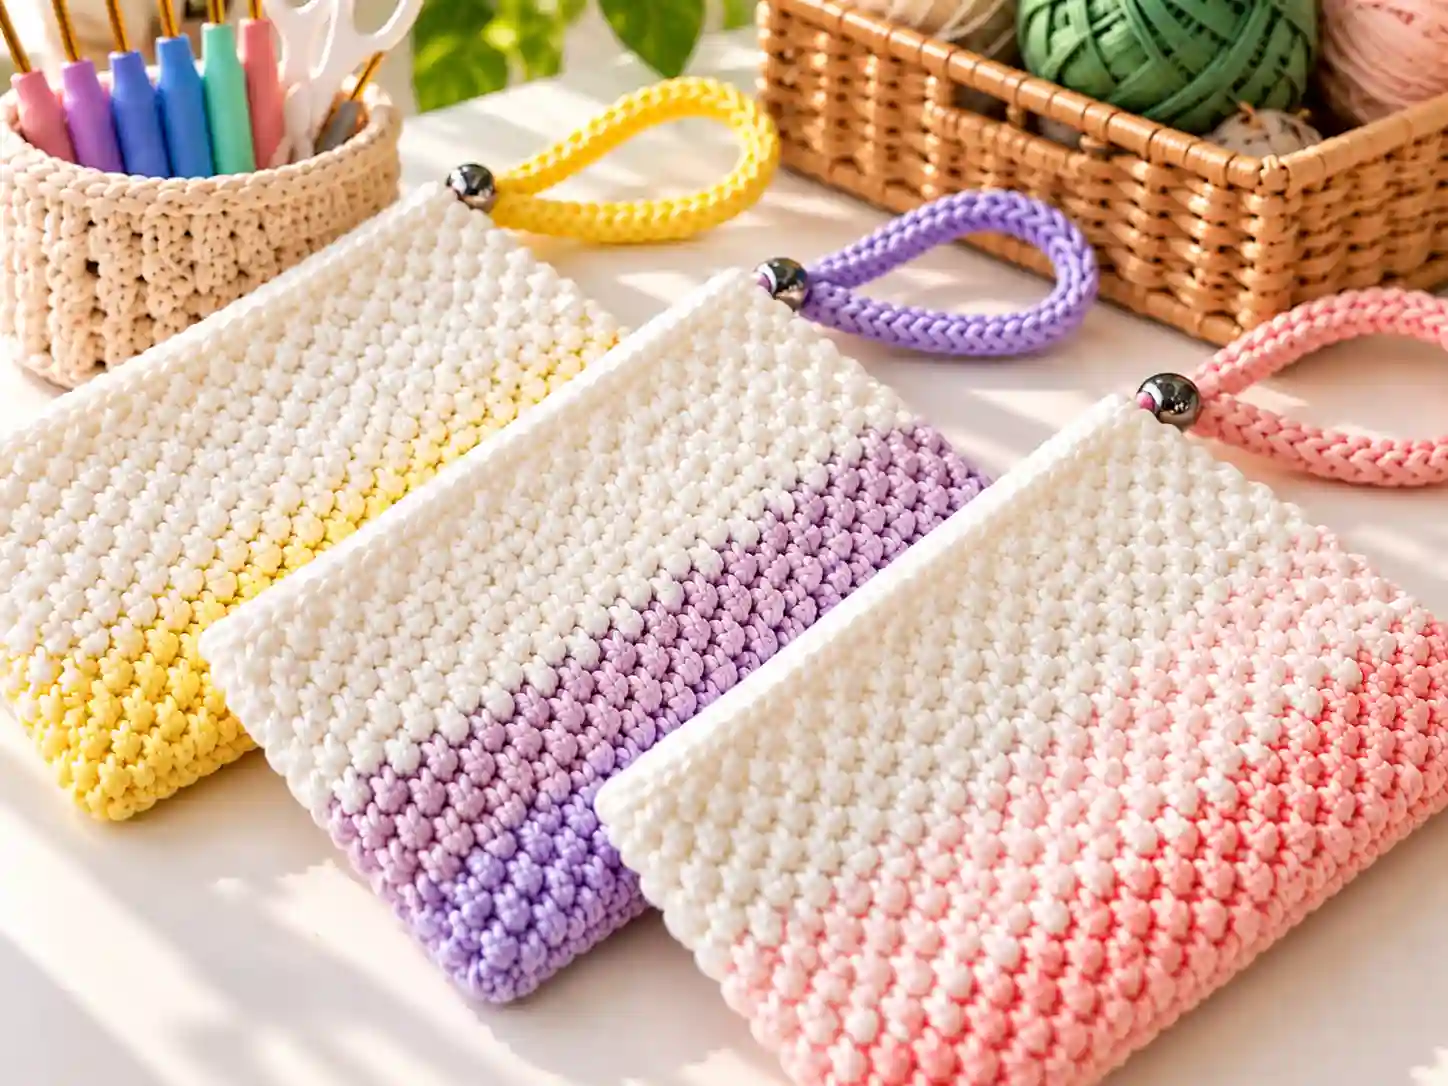
This simple crochet pouch is a quick, practical project that works beautifully as an easy crochet zipper pouch or a no-zip clutch. It is perfect for storing hooks, coins, earbuds, makeup, or travel essentials, and it is friendly to beginners who want a useful small size crochet pouch pattern they can finish in an evening.
Why You’ll Love This Crochet Pouch
- Beginner-friendly construction using basic stitches
- Quick project that uses a small amount of yarn
- Easy crochet clutch style that can be customized with colors
- Scrap-yarn friendly and great for gifts
- Practical crochet pouch for multiple uses around the home or on the go
Finished Size
Because yarn, hook size, and tension vary, finished measurements are not fixed here. Work a small swatch in your chosen yarn and hook, then adjust the foundation chain and number of rows until the pouch reaches the size you want. As a reference, many simple crochet pouches finish around 6 to 8 inches wide and 4 to 5 inches tall before assembly, but your results may differ.
Materials You’ll Need
- Cotton or cotton-blend yarn in your preferred weight (DK or light worsted works well)
- Crochet hook appropriate for your yarn
- Tapestry needle
- Scissors
- Stitch markers (optional but helpful)
- Zipper (for a zipper pouch version)
- Fabric lining (optional, for a neater interior)
- Sewing needle and thread (for attaching zipper and lining, if using)
Yarn Information
A smooth cotton or cotton-blend yarn gives this crochet personal pouch pattern a crisp look and durable finish. DK or light worsted weight is ideal for a small size crochet pouch pattern that still feels substantial. You will only need a small amount, often well under one skein, making this a great scrap-yarn project.
Changing yarn weight will change the finished size and fabric density. Heavier yarn creates a thicker, more structured pouch, while finer yarn produces a lighter, more delicate result. Always match your hook to your yarn and adjust the foundation chain and row count to reach your desired dimensions.
Crochet Hook
Use the hook size recommended for your yarn, typically in the 3.5 mm to 5 mm range for DK to light worsted cotton. If you want a tighter fabric that holds small items securely, consider using a hook slightly smaller than the yarn label suggests.
Crochet Abbreviations (US Terminology)
- ch: chain
- sc: single crochet
- hdc: half double crochet
- sl st: slip stitch
- st(s): stitch(es)
- sp(s): space(s)
- rep: repeat
- RS: right side
- WS: wrong side
This pattern uses US crochet terminology.
Pattern Notes
- The main body is worked in rows, then folded and seamed to form the pouch.
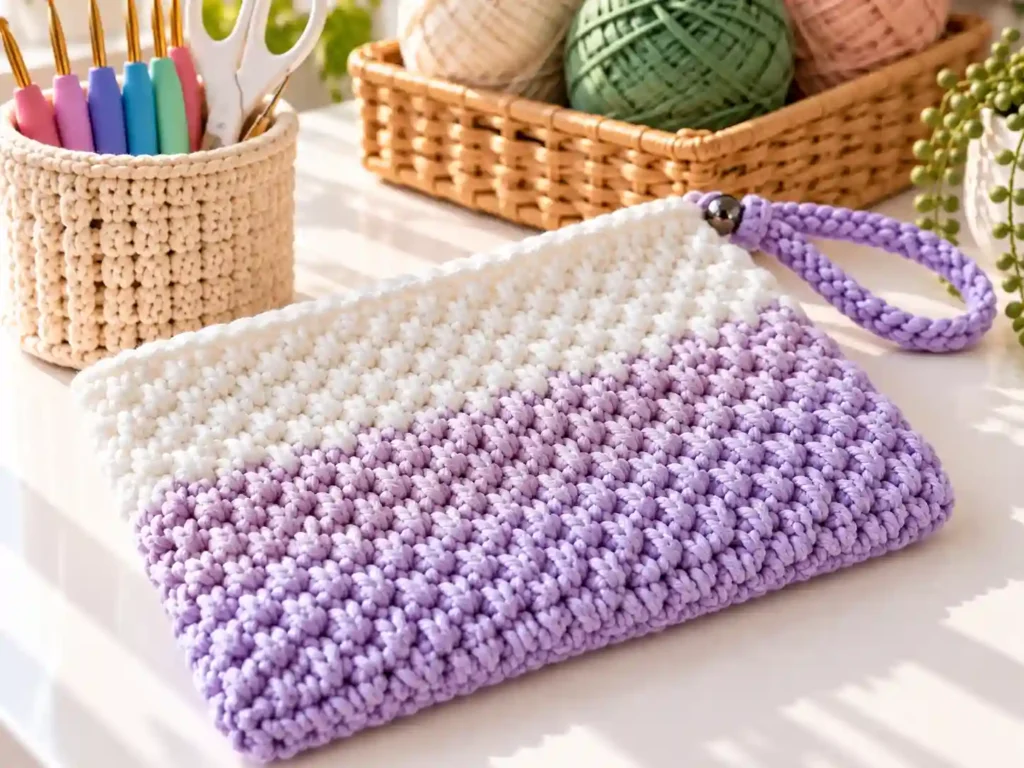
- The moss stitch (also called linen or granite stitch) creates a dense, polished fabric that is still easy to work.
- The turning chain does not count as a stitch in this pattern.
- For a zipper version, the top edge is left open for zipper insertion.
- For a no-zip clutch, the top can be finished with a folded edge or a simple button closure.
- Work with consistent tension to keep the edges straight and the shape even.
Crochet Pattern: Simple Crochet Pouch Free Pattern
Part 1: Main Body (Moss Stitch Panel)
Foundation:
Ch a multiple of 2 plus 1, to match your desired width plus a little ease. For a medium-small pouch, many crocheters start around ch 27 to ch 31, but adjust to your needs.
Row 1 (RS):
Sc in the 2nd ch from the hook and in each ch across. Ch 1, turn.
(You should have an odd number of stitches.)
Row 2:
Sc in the first st, ch 1, skip next st, sc in next st; rep from across. Ch 1, turn.
Row 3:
Sc in each sc and in each ch-1 sp across (you will work a sc into every ch-1 space from the previous row). Ch 1, turn.
Rows 4 to desired height:
Rep Row 3 until the panel is about twice the height you want for the finished pouch (since it will be folded). For a typical small pouch, this often lands around 20 to 30 total rows, depending on yarn and hook.
Fasten off, leaving a long tail for sewing if you prefer to use yarn for assembly.
Part 2: Optional Zipper Edge Reinforcement
If you are adding a zipper, you may work one or two finishing rows along the top edge to create a clean border.
Zipper Border Row (RS):
With RS facing, join yarn at one top corner. Ch 1, sc evenly across the top edge, working into sts and ch-sps as they appear. Sl st to first sc to join if working in a round, or simply fasten off if working flat. This step is optional but helps stabilize the edge for sewing in a zipper.
Assembly
- Fold the panel in half with the RS together, aligning the side edges. The top edge (where the zipper will go) remains open.
- Using a tapestry needle and the long yarn tail (or matching yarn), whipstitch or mattress-stitch the side seams from the bottom up to the top edge. Reinforce by sewing down and back up for durability.
- Turn the pouch right side out.
- If using a lining, cut two lining pieces slightly smaller than the crochet panels, sew them together along the sides, and insert into the pouch.
- Pin the zipper between the crochet top edge and the lining (if using), with the zipper tape hidden behind the lining on the inside.
- Hand-sew the zipper in place with small, neat stitches along both sides of the top edge.
- For a no-zip clutch, fold the top edge to the inside and stitch down, or add a button and loop closure.
Finishing Touches
- Weave in all ends securely on the inside of the pouch.
- Gently shape the pouch with your hands, smoothing the side seams.
- If the fabric feels too stiff, lightly steam or block to relax the stitches, taking care not to distort the shape.
- Trim any stray fibers for a clean finish.
Crochet Tips
- Keep your edge stitches even to avoid wavy or pulled-in sides.
- Count stitches periodically to ensure the moss stitch pattern remains consistent.
- If the piece curls, try a slightly larger hook or add a border of sc around the edges before assembly.
- For a tighter weave that prevents small items from peeking through, use a hook one size smaller than usual.
- Pin the zipper before sewing to check alignment and avoid puckering.
Variations
- Try different colors or two-tone stripes for a custom look.
- Use a heavier yarn for a chunky small size crochet pouch pattern, or finer thread for a delicate version.
- Add a tassel, pom-pom, or embroidered initials for personalization.
- Create seasonal versions with holiday colors or themed appliqués.
- Adjust the foundation chain and row count to make a larger pouch for travel or a tiny one for coins or earbuds.
Common Problems and Troubleshooting
Problem: The piece is curling at the edges.
Solution: This often comes from tight tension or an unbalanced stitch count. Try a slightly larger hook, ensure you are working into every ch-1 sp evenly, and consider adding a stabilizing sc border around the edges before assembly.
Problem: The finished pouch is too small.
Solution: Increase the foundation chain width and add more rows before folding. Always swatch first to estimate how your yarn and hook combination translates to size.
Problem: The stitch count seems off in the moss stitch rows.
Solution: Remember that each “sc, ch 1, skip 1” unit uses two stitches from the row below. Count your sc stitches and ch-1 spaces; they should alternate evenly across. Mark the first and last stitch of each row to stay oriented.
How to Use the Finished Crochet Project
- Store crochet hooks, stitch markers, and notions
- Hold coins, cards, or keys as an easy crochet clutch
- Organize makeup, skincare samples, or travel toiletries
- Keep earbuds, chargers, or small tech accessories tidy
- Use as a gift pouch for handmade presents or party favors
Care Instructions
- Hand wash gently in cool water with mild detergent.
- Lay flat to dry, reshaping as needed.
- Avoid wringing or twisting to maintain the pouch shape.
- Store in a dry place; if the pouch becomes misshapen, lightly steam and reshape.
Frequently Asked Questions
Can a beginner make this crochet pouch?
Yes. This beginner crochet pouch design uses only basic stitches and simple construction, making it ideal for first-time pouch makers.
What yarn works best for a simple crochet pouch?
Smooth cotton or cotton-blend DK or light worsted yarn gives a sturdy, clean result. You can also use acrylic or blends depending on your preference.
Can I use a different hook size?
Yes. A smaller hook creates a denser fabric, while a larger hook makes a softer, more flexible pouch. Just adjust your foundation chain and row count to reach your desired size.
Can I make the pouch larger or smaller?
Absolutely. Increase or decrease the foundation chain for width, and add or remove rows for height before folding and seaming.
Can I use a different yarn weight?
Yes. Heavier yarn will produce a bulkier pouch; finer yarn will create a smaller, more delicate one. Always swatch to check gauge and adjust dimensions accordingly.
How do I prevent the piece from curling?
Maintain even tension, ensure accurate stitch counts in the moss stitch, and consider adding a stabilizing sc border around the edges before assembly.
How should I wash the finished project?
Hand wash gently in cool water and lay flat to dry. Reshape while damp and avoid harsh agitation to keep the pouch looking neat.
Conclusion
This simple crochet pouch is a versatile, satisfying make that fits easily into a single crafting session. Whether you create an easy crochet zipper pouch for everyday essentials or a no-zip clutch for gifts, you can customize colors, size, and details to suit your style. Grab your yarn, work up a swatch, and enjoy making a practical crochet pouch for multiple uses that you will reach for again and again.