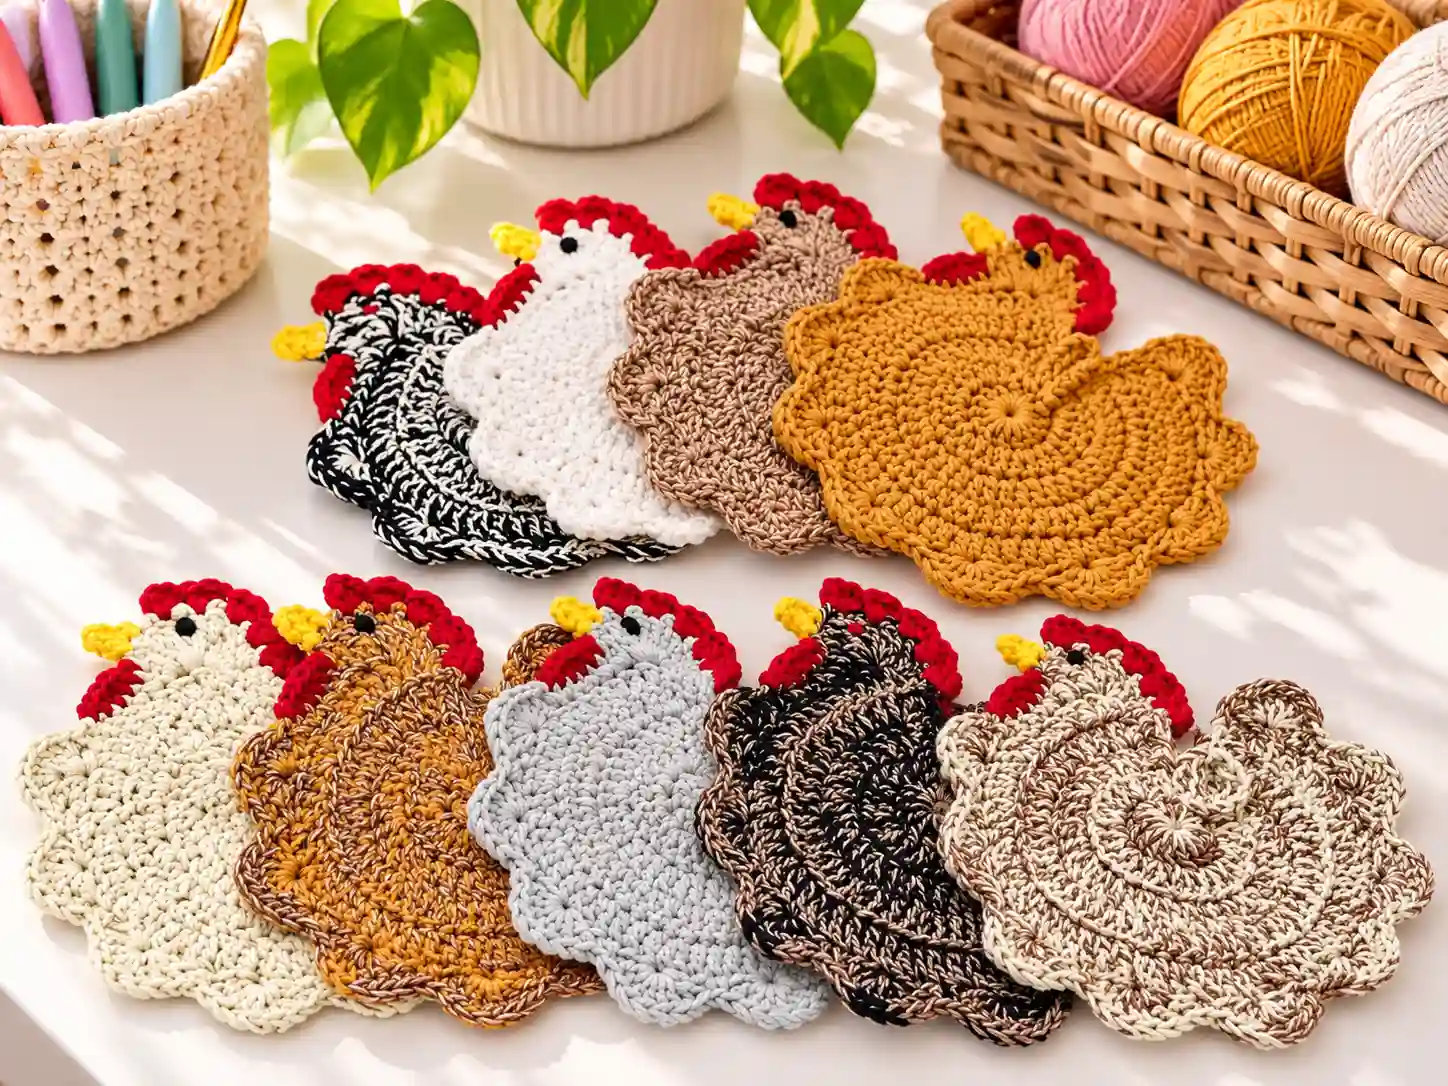
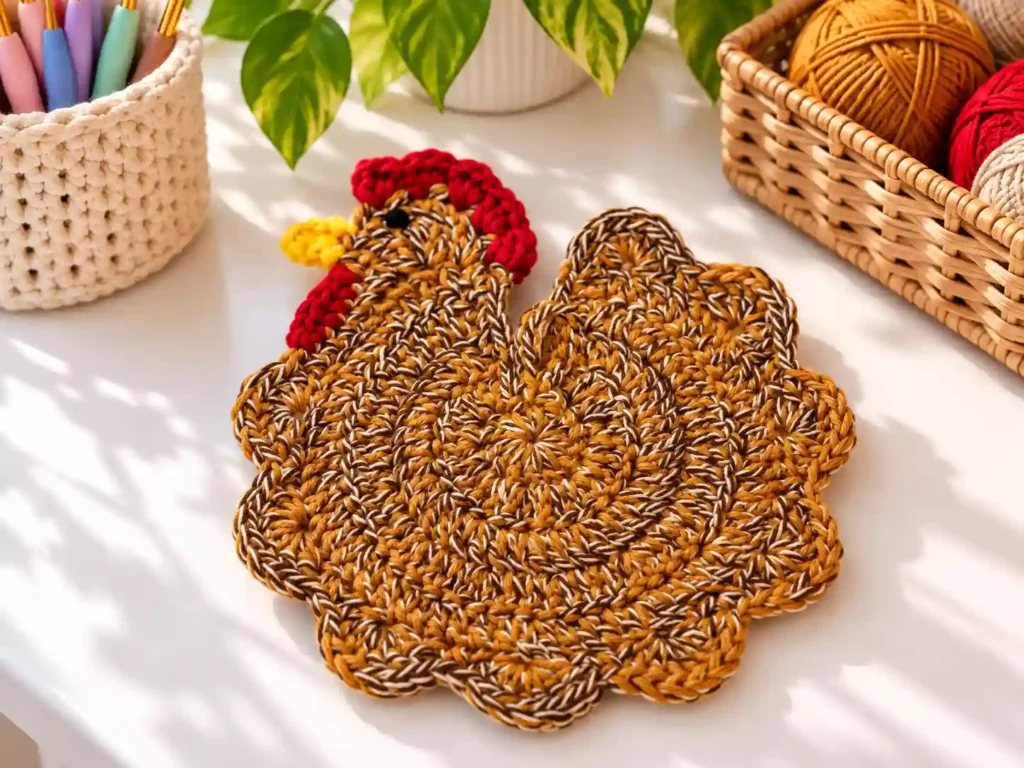
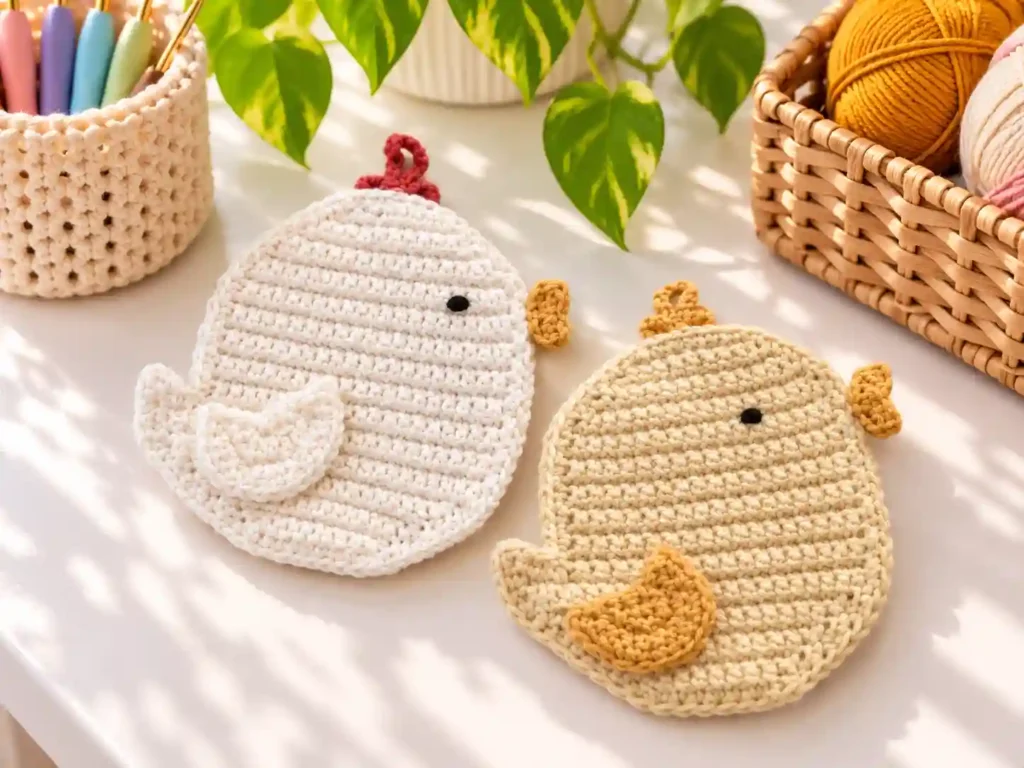
This Chicken Potholder Crochet project turns simple cotton yarn into a cheerful, double-thick potholder shaped like a friendly farm chicken. It is designed to be useful on busy cooking days and cute enough to hang as seasonal décor. The construction is straightforward: two flat circles joined around the edge with a small hanging loop. Facial details are embroidered or crocheted as small appliqués, then sewn in place.
If you enjoy Spring Crochet Potholder Designs, this chicken hot pad fits right in with Easter and farmhouse themes. It also works well as a quick gift for neighbors, teachers, or fellow chicken lovers.
Why You’ll Love This Crochet Project
- Double-thick construction for better heat protection
- Worked in continuous rounds for a smooth, seamless look
- Uses basic stitches: chain, slip stitch, single crochet, half double crochet, and double crochet
- Great scrap-yarn project for red, orange, yellow, and tan cotton
- Finished size is handy for everyday pots and pans
- Easy to customize colors for different chicken breeds or seasonal palettes
Finished Size
Approximately 7 to 8 inches in diameter, depending on yarn weight, hook size, and tension. Because this pattern is based on common free Chicken Potholders Crochet Free Pattern structures, your size may vary slightly.
Materials You’ll Need
- Medium-weight cotton yarn (worsted / Aran, category 4) in:
- Main color (tan, buff, or light brown for the body)
- Small amounts of red (comb), orange or yellow (beak), and black or dark brown (eyes)
- Crochet hook sized for your yarn (commonly 4.5 mm to 5.5 mm for cotton)
- Tapestry needle for weaving ends and sewing details
- Scissors
- Stitch marker
- Optional: small amount of fiberfill if you want a slightly puffed look (not required for a flat potholder)
Yarn Information
A 100% cotton yarn is ideal for a Crochet Chicken Hot Pad because cotton is more heat-resistant than acrylic and has good stitch definition. Look for kitchen or dishcloth cotton in worsted weight.
You will need roughly 80 to 120 yards of the main color and just a few yards each of red, orange or yellow, and black. Switching to a lighter yarn weight or smaller hook will produce a smaller, denser potholder; a heavier yarn or larger hook will make it bigger and slightly looser.
Crochet Hook
Use the hook size recommended on your yarn label as a starting point. Many free Crochet Chicken Potholder Free Pattern tutorials use a 4.5 mm to 5.0 mm hook with worsted cotton. If your stitches feel too tight, go up one hook size; if they feel loose and floppy, go down one size.
Crochet Abbreviations (US Terminology)
This Chicken Pot Holders Crochet Free Pattern uses US crochet terms.
- ch: chain
- sl st: slip stitch
- sc: single crochet
- hdc: half double crochet
- dc: double crochet
- inc: increase (2 stitches in the same stitch)
- st(s): stitch(es)
- rnd(s): round(s)
- MC: main color
- CC: contrast color
Pattern Notes
- The body is worked as two identical flat circles, then joined around the edge.
- Work in continuous rounds unless otherwise noted; place a stitch marker in the first stitch of each round.
- Chains at the beginning of a round do not count as a stitch unless specified.
- The hanging loop is created at the top of the chicken before fastening off.
- Facial features can be embroidered directly or made as small crocheted pieces and sewn on.
Crochet Pattern
Part 1: Chicken Body (Make 2 Identical Circles)
Use MC (tan or buff).
Rnd 1: Make a magic ring, ch 1, work 8 hdc into the ring, pull tight, sl st to first hdc. (8 hdc)
Rnd 2: Ch 1, 2 hdc in each st around, sl st to first hdc. (16 hdc)
Rnd 3: Ch 1, 1 hdc, 2 hdc in next st, repeat around, sl st to first hdc. (24 hdc)
Rnd 4: Ch 1, 1 hdc in next 2 sts, 2 hdc in next st, repeat around, sl st to first hdc. (32 hdc)
Rnd 5: Ch 1, 1 hdc in next 3 sts, 2 hdc in next st, repeat around, sl st to first hdc. (40 hdc)
Rnd 6: Ch 1, 1 hdc in next 4 sts, 2 hdc in next st, repeat around, sl st to first hdc. (48 hdc)
Rnd 7: Ch 1, 1 hdc in next 5 sts, 2 hdc in next st, repeat around, sl st to first hdc. (56 hdc)
Fasten off, leaving a tail for sewing if desired. Make a second identical circle.
Part 2: Head Shaping and Hanging Loop
On one of the circles (this will be the front), count and mark the top center stitch to indicate where the chicken’s head will be.
Row 1 (Head Base): With MC, join at the marked top stitch, ch 1, sc in same st, hdc in next 2 sts, dc in next 2 sts, hdc in next 2 sts, sc in next 2 sts. Fasten off. This creates a slight bump for the head area.
Hanging Loop: Count about 9 stitches back from the top center on the same front circle. Join MC, ch 15, sl st in the back bump of each chain back to the join, then sl st into the edge to secure. Fasten off. Adjust chain length if you prefer a shorter or longer loop.
Part 3: Comb (Red)
Use red CC.
Row 1: Ch 4, 3 dc in 4th ch from hook, ch 2, sl st in same space, ch 2, 3 dc in same space, ch 2, sl st. Fasten off, leaving a tail.
Position the comb at the top center of the head and sew in place.
Part 4: Beak (Orange or Yellow)
Use orange or yellow CC.
Row 1: Ch 4, sc in 2nd ch from hook, hdc in next ch, dc in last ch. Fasten off, leaving a tail.
Center the beak just below the comb and sew in place.
Part 5: Eyes (Black or Dark Brown)
Embroider two small eyes with black yarn using a tapestry needle, placing them a few rows below the top of the head and about 3 stitches apart. Alternatively, chain 3, sl st in each chain to make tiny dots, and sew them on.
Assembly
- Place the two circles together with right sides facing out.
- With MC, join at the top edge near the hanging loop.
- Work sc evenly around the entire edge, inserting the hook through both layers.
- When you reach the top again, incorporate the base of the hanging loop into your stitches for extra strength.
- Sl st to the first sc, fasten off, and weave in all ends on the inside or back side.
Finishing Touches
- Weave in all yarn tails securely so they do not show on the front.
- Gently block the potholder by misting with water, shaping into a round, and letting it dry flat.
- If desired, lightly steam to even out stitches, avoiding direct contact with any embroidered details.
Crochet Tips
- Keep your tension consistent to ensure both circles are the same size.
- Count stitches at the end of each round to avoid accidental increases or decreases.
- Use a stitch marker in the first stitch of every round to keep track of your starting point.
- If the piece begins to curl, check your increase pattern and make sure you are not adding too many or too few stitches.
- For a sturdier Crochet Chicken Hot Pad, use a slightly smaller hook with the same yarn.
Variations
- Change the main color to white, black, or speckled for different chicken breeds.
- Use pastel yarns for a soft Spring Crochet Potholder Designs look.
- Omit the hanging loop for a purely functional pot holder.
- Add small crocheted wings on each side using shell stitches.
- Make a matching set with rooster, hen, and chick motifs using similar circle bases.
Common Problems and Troubleshooting
Problem: The circles are not lying flat.
Solution: Check your increase pattern. If it curls upward, you may need more increases; if it ruffles, you may have too many.
Problem: The two circles are different sizes.
Solution: Count stitches each round and match your hook and tension for both pieces. Remake the smaller circle if needed.
Problem: The hanging loop feels weak.
Solution: Work the loop with a smaller hook for tighter stitches, or chain fewer stitches and reinforce by sewing a small fabric tab behind it.
Problem: Facial details look uneven.
Solution: Lightly sketch placement with a washable fabric marker before sewing. Keep comb and beak centered on the head bump.
How to Use the Finished Crochet Project
- Protect countertops and tables from hot pots and pans
- Hang on a kitchen hook as seasonal spring or Easter décor
- Gift as part of a housewarming or hostess present
- Use as a decorative trivet under teapots and casserole dishes
- Incorporate into a farmhouse-themed kitchen set with matching towels
Care Instructions
- Hand wash in cool water with mild detergent.
- Lay flat to dry; reshape while damp.
- Avoid high heat in the dryer, which can shrink cotton and distort stitches.
- Store flat or hanging to maintain shape.
Frequently Asked Questions
Can a beginner make this Chicken Potholder Crochet pattern?
Yes. It uses basic stitches and simple shaping. If you can work in continuous rounds and embroider simple details, you can complete this project.
What yarn works best for a Crochet Chicken Hot Pad?
100% cotton in worsted weight is ideal. It is heat-resistant, washable, and shows stitch definition well.
Can I use a different hook size?
Yes. A smaller hook makes a denser, sturdier potholder; a larger hook makes a bigger, softer one. Just ensure the fabric is tight enough to be functional.
Can I make the potholder larger or smaller?
Absolutely. Add or remove increase rounds to change the diameter, or switch yarn weight and hook size.
Can I use acrylic yarn instead of cotton?
You can, but acrylic is less heat-resistant and may melt or deform with very hot items. Cotton is safer for a functional hot pad.
How do I prevent the piece from curling?
Follow the increase pattern carefully and block the finished circles flat before joining. Adjust your hook size if your tension is very tight.
How should I wash the finished project?
Hand wash or use a gentle machine cycle in cool water, then lay flat to dry. Avoid high heat to preserve shape and color.
Conclusion
This Chicken Potholder Crochet pattern gives you a practical, double-thick hot pad with a playful farm look that fits perfectly into Spring Crochet Potholder Designs. With simple stitches, easy shaping, and room for color creativity, it is a satisfying weekend project that results in a useful kitchen accent or thoughtful handmade gift.