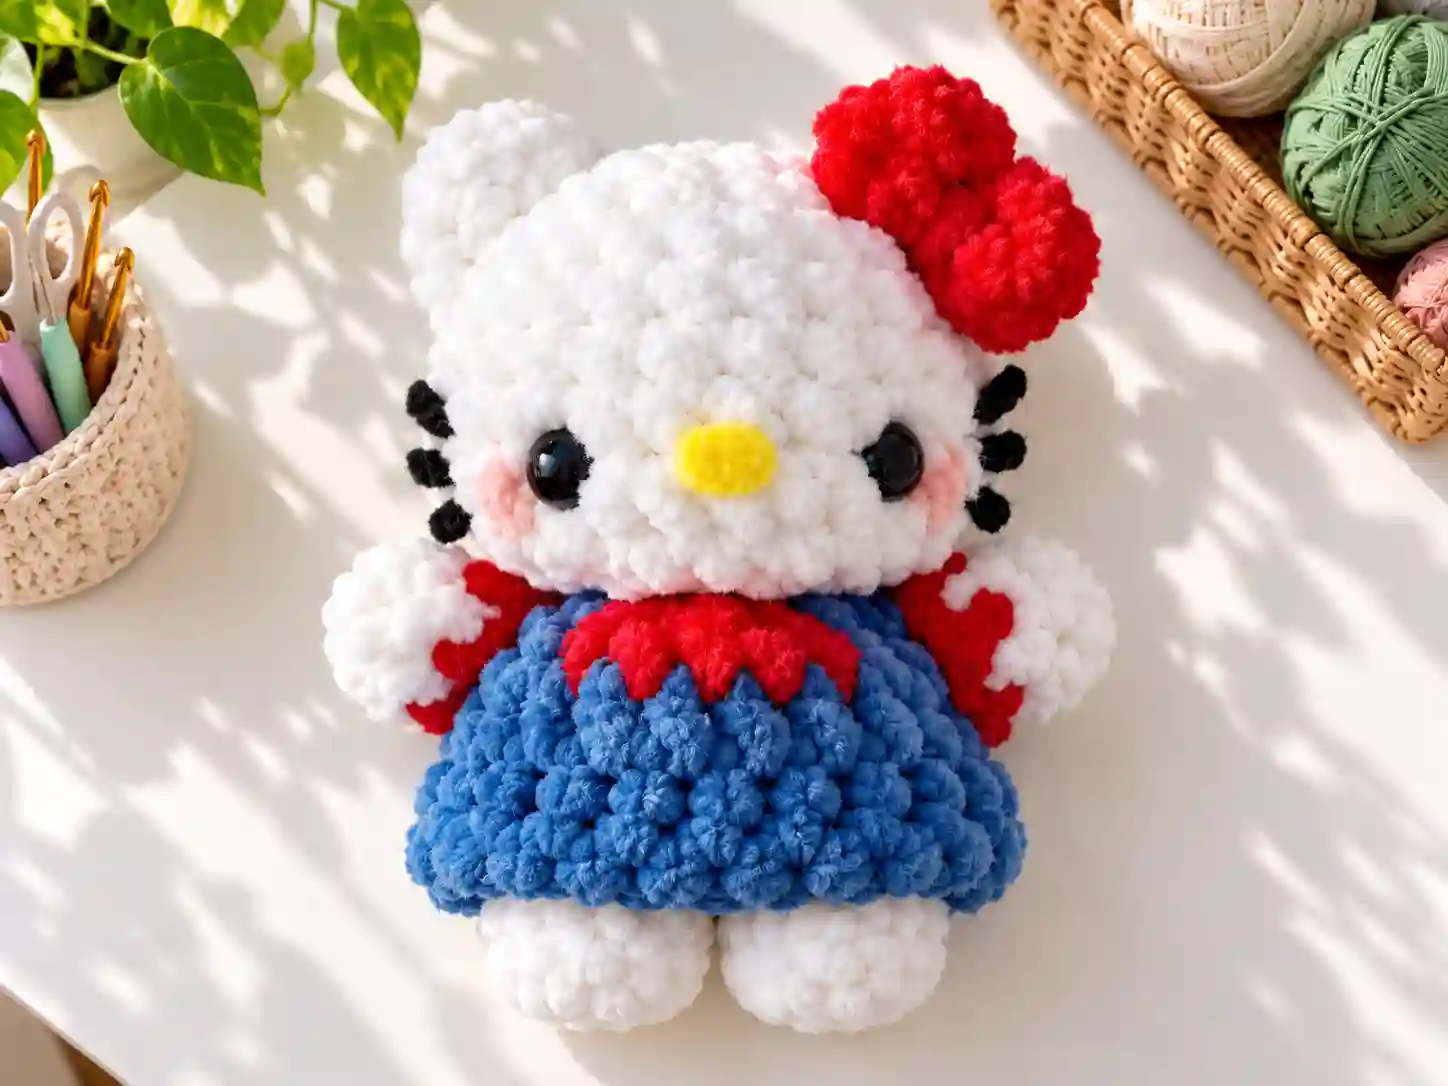
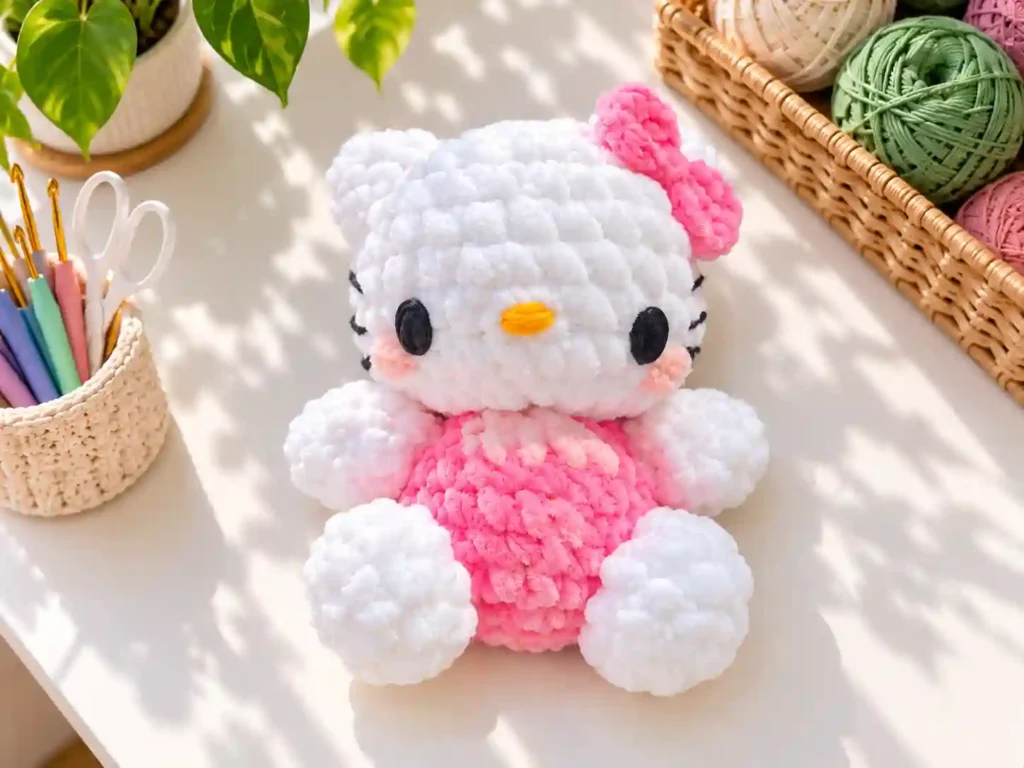
There’s something irresistibly charming about a handmade Hello Kitty plushie, especially when she’s crafted in that dreamy baby-like style with oversized features and soft, huggable proportions. This plushie baby Hello Kitty crochet amigurumi free pattern brings together classic character recognition with the cozy appeal of chenille-style yarn work, making her perfect for gifting, decorating, or simply enjoying as a personal keepsake.
Designed by iuli.crochets, this pattern walks you through creating Hello Kitty’s iconic head, body, arms, legs, ears, and signature bow using straightforward single crochet construction worked in continuous rounds. The color changes white for the head and limbs, red for the dress section, and dark blue for the lower body—give her that instantly recognizable look while keeping the stitch work accessible for crocheters ready to tackle their first character amigurumi.
Whether you’re making her as a baby shower gift, a birthday surprise, or a cheerful addition to your own amigurumi collection, this Hello Kitty crochet plushie pattern delivers satisfying results without overwhelming complexity. She’s small enough to work up in a weekend yet detailed enough to feel like a real accomplishment.
Why You’ll Love This Hello Kitty Amigurumi
- Beginner-friendly amigurumi construction with clear round-by-round instructions
- Quick project that works up in a weekend using worsted or chenille-style yarn
- Classic Hello Kitty styling with customizable color options
- Perfect size for gifts, nursery décor, or keychain accessories
- Uses basic stitches: single crochet, increases, decreases, and simple color changes
- Minimal finishing with straightforward assembly steps
Finished Size
The finished plushie baby Hello Kitty measures approximately 6 to 8 inches tall when worked with the recommended 4.5 mm hook and worsted-weight yarn, though your exact size will vary based on yarn choice, hook size, and personal tension.
Materials You’ll Need
- White, red, and dark blue yarn (worsted weight or chenille-style yarn works beautifully)
- 4.5 mm crochet hook
- 8 mm safety eyes (smaller or larger depending on desired plushie size)
- Yellow and black felt for nose and whiskers
- Scissors
- Hot glue or fabric glue
- Yarn needle
- Polyester fiberfill stuffing
- Optional: red chalk pastel or pink yarn for blush cheeks
Yarn Information
This pattern calls for white, red, and dark blue yarn in worsted weight or a soft chenille-style yarn for that extra-plush feel. You won’t need large quantities most crocheters can complete this project with less than one skein of each color.
Chenille yarn (sometimes labeled as “velvet” or “plush” yarn) gives the finished Hello Kitty an incredibly soft, squeezable texture that’s perfect for a baby-style plushie. If you substitute a different yarn weight, expect the finished size to change accordingly: lighter yarn with a smaller hook produces a smaller doll, while bulkier yarn with a larger hook creates a bigger, chunkier version.
Crochet Hook
Use a 4.5 mm crochet hook for the gauge and size intended by the designer. If you’re working with chenille yarn, you may find it easier to see your stitches with good lighting or by using a hook with a contrasting color to the yarn.
Crochet Abbreviations (US Terminology)
This pattern uses US crochet terminology throughout.
- MR: Magic ring
- Ch: Chain
- Sc: Single crochet
- Inc: Increase (2 sc in same stitch)
- Dec: Decrease (sc2tog)
- Hdc: Half double crochet
- Slst: Slip stitch
- BLO: Back loop only
Pattern Notes
- Worked in continuous rounds unless otherwise noted; use a stitch marker to track the beginning of each round.
- Color changes are worked at the start of designated rounds; carry yarn loosely along the inside or cut and rejoin as instructed.
- The body features a BLO (back loop only) round to create a subtle ridge at the dress line.
- Safety eyes are inserted between rounds 8 and 9 of the head, 5 stitches apart.
- Do not stuff the arms, ears, or legs—these remain flat for easier sewing during assembly.
- Leave long yarn tails on all pieces for sewing; the body’s blue tail is specifically used to attach the body to the head.
Crochet Pattern
Head (Make 1, in white)
Rnd 1: 6 sc in MR (6 sts)
Rnd 2: 6 inc (12 sts)
Rnd 3: (sc, inc) x6 (18 sts)
Rnd 4: (2 sc, inc) x6 (24 sts)
Rnd 5–7: Sc around (24 sts each round)
Rnd 8: (3 sc, inc) x6 (30 sts)
Insert safety eyes 5 stitches apart between rounds 8 and 9.
Rnd 9: Sc around (30 sts)
Rnd 10: (sc, dec) x10 (20 sts)
Rnd 11: 10 dec (10 sts)
Stuff the head firmly, then slst and fasten off.
Body (Make 1, start in dark blue)
Rnd 1: Ch 4
Rnd 2: 2 sc, inc in 3rd chain from hook, 2 sc (6 sts)
Rnd 3: 6 inc (12 sts)
Rnd 4: 12 inc (24 sts)
Rnd 5: Sc around in BLO (24 sts)
Rnd 6–7: Sc around (24 sts each round)
Rnd 8: (dec, 10 sc) x2 (22 sts)
Rnd 9: Sc, change to red, 5 sc, change to blue, 16 sc (22 sts)
Rnd 10: Dec, dec (drag red yarn through second stitch), dec, dec (drag blue yarn through second stitch), 7 dec (11 sts)
Stuff the body, then slst. Cut off the red tail and leave the long blue tail for sewing the body to the head.
Arms (Make 2, start in white)
Rnd 1: 6 sc in MR (6 sts)
Rnd 2–3: Sc around (6 sts each round)
Change to red.
Rnd 4: Sc around (6 sts)
Do not stuff. Slst and leave a long tail for sewing.
Ears (Make 2, in white)
Rnd 1: 4 sc in MR (4 sts)
Rnd 2: (sc, inc) x2 (6 sts)
Rnd 3: (sc, inc) x3 (9 sts)
Rnd 4: (2 sc, inc) x3 (12 sts)
Do not stuff. Slst and leave a long tail for sewing.
Legs (Make 2, in white)
Rnd 1: 6 sc in MR (6 sts)
Rnd 2: 6 inc (12 sts)
Rnd 3: Sc around (12 sts)
Rnd 4: (sc, dec) x4 (8 sts)
Do not stuff. Slst and leave a long tail for sewing.
Bow (Make 1, in red)
Rnd 1: Ch 5
Rnd 2: Starting from 2nd chain from hook, 3 hdc, 2 hdc in 4th chain, 3 hdc on other side of chains (8 sts)
Rnd 3: Sc around (8 sts)
Slst and leave a long tail to wrap around the middle of the bow.
Felt Cutouts
- Cut one small oval from yellow felt for the nose.
- Cut six small ovals from black felt for the whiskers (three per side).
Assembly
- Sew the body to the head using the long blue tail from the body. Align the red dress section to the center front of the head, directly between the eyes.
- Sew the arms 2 stitches away from the red section on each side of the body, attaching from between rounds 8–9 down to the last row of the body.
- Sew the legs 3 stitches apart, attaching from rounds 5–6 to rounds 7–8 of the body.
Attaching Ears, Bow, and Felt Details
- Sew the ears onto the head starting between rounds 2–3, stitching around the ear edges down to rounds 5–6 of the head.
- Fold the bow in half and wrap the long tail around the center 3 times to create the bow shape. Sew the bow between the head and the right-side ear (from Hello Kitty’s perspective). Optional: secure with a small dot of glue.
- Glue the yellow felt nose between the eyes, positioned between rounds 8–9 of the head.
- Glue the black felt whiskers 2 stitches away from each eye (three on each side).
- Optional: Lightly dust the cheeks with red chalk pastel or embroider small pink stitches for a blushing effect.
Finishing Touches
Weave in any remaining yarn tails securely inside the body and head. Check that all felt pieces are firmly glued and that safety eyes are locked in place. Gently reshape the plushie by rolling her between your palms to distribute stuffing evenly.
Crochet Tips for Success
- Use a stitch marker at the first stitch of every round to avoid losing your place, especially during color changes.
- When working with chenille or plush yarn, slow down and feel for each stitch with your hook if visibility is low.
- Keep tension consistent during increases and decreases to maintain a round, symmetrical shape.
- Stuff the head and body firmly but not so tightly that the stitches stretch open.
- Practice the color-change technique on a swatch before starting the body if you’re new to carrying yarn.
Variations to Try
- Swap the classic red dress for pink, lavender, or mint green for a custom color palette.
- Use sparkly or variegated yarn for the bow to add a festive touch.
- Make a mini version using sport-weight yarn and a 3.0 mm hook for keychains or ornaments.
- Add embroidered details like tiny hearts or stars on the dress section.
- Create a seasonal Hello Kitty by adding a crocheted Santa hat, pumpkin, or flower crown.
Common Problems and Troubleshooting
Problem: The head or body is lopsided.
Solution: Check your stitch count at the end of each round. Missing an increase or decrease can throw off the shape. Use a stitch marker and recount stitches every few rounds.
Problem: Color changes look messy or create holes.
Solution: Work the last yarn-over of the final stitch in the new color, and carry yarn loosely along the inside. Tug gently on both colors after the change to tighten the transition.
Problem: The plushie feels too soft or floppy.
Solution: Add more fiberfill, especially in the head and body. For chenille yarn, pack stuffing firmly as you go rather than waiting until the end.
Problem: Safety eyes won’t stay in place.
Solution: Insert eyes between the correct rounds (8–9 for this pattern) and secure the washers on the inside before stuffing. If needed, add a drop of fabric glue to the washer.
How to Use Your Finished Hello Kitty Plushie
- Gift for babies, toddlers, or Hello Kitty fans of any age
- Display on a nursery shelf, bookcase, or windowsill
- Attach a keychain ring to create a large, huggable bag charm
- Pair with other amigurumi characters for a playful collection
- Use as a photo prop for birthday parties or baby showers
- Incorporate into handmade gift baskets with matching accessories
Care Instructions
Hand wash gently in cool water with mild detergent. Avoid wringing or twisting the plushie. Press out excess water with a towel and reshape while damp. Air dry flat away from direct heat or sunlight. If using safety eyes and felt details, avoid machine washing to prevent loosening.
Frequently Asked Questions
Can a beginner make this plushie baby Hello Kitty crochet amigurumi pattern?
Yes, this pattern is suitable for beginners who know basic amigurumi stitches like single crochet, increases, and decreases. Clear round-by-round instructions guide you through each section.
What yarn works best for this Hello Kitty crochet plushie pattern?
Worsted-weight acrylic or soft chenille yarn works beautifully. Chenille gives an extra-plush, baby-like texture that matches the design intent.
Can I use a different hook size?
You can, but it will change the finished size and fabric density. A larger hook creates a bigger, looser plushie; a smaller hook makes a tighter, smaller doll.
How do I prevent the piece from curling?
Amigurumi worked in continuous rounds naturally forms a sphere. If edges curl unexpectedly, check that you’re following the increase and decrease pattern accurately.
Can I make this Hello Kitty pattern crochet larger or smaller?
Yes, by changing yarn weight and hook size. Use bulkier yarn and a larger hook for a bigger plushie, or lighter yarn and a smaller hook for a miniature version.
How should I wash the finished project?
Hand wash in cool water with mild soap, then air dry flat. Avoid machine washing to protect safety eyes and felt details.
Where can I find more free crochet patterns Hello Kitty?
Many amigurumi designers offer free Hello Kitty crochet patterns online. Look for patterns with clear photos, stitch counts, and assembly instructions for best results.lovesewing+1
Start Crocheting Your Own Hello Kitty Today
This plushie baby Hello Kitty crochet amigurumi free pattern combines nostalgic charm with satisfying stitch work, giving you a delightful handmade keepsake in just a few rounds. With clear instructions, accessible techniques, and endless customization options, she’s the perfect project to brighten your crochet queue—or someone else’s day. Grab your hook, pick your favorite soft yarn, and bring this iconic character to life one single crochet at a time.