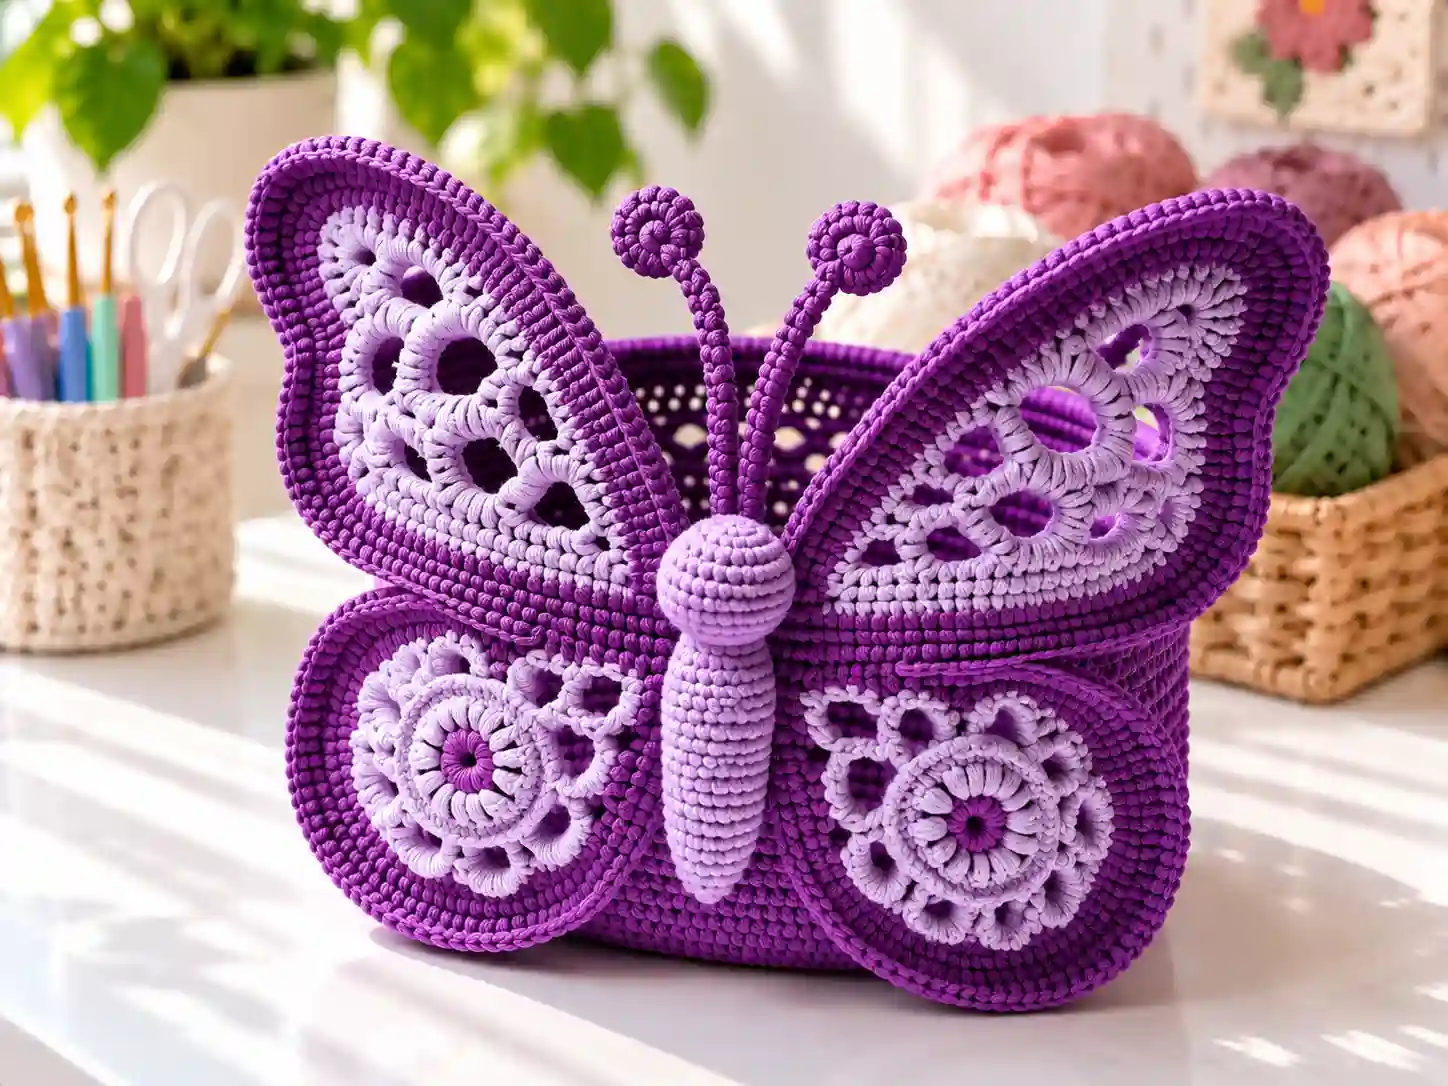
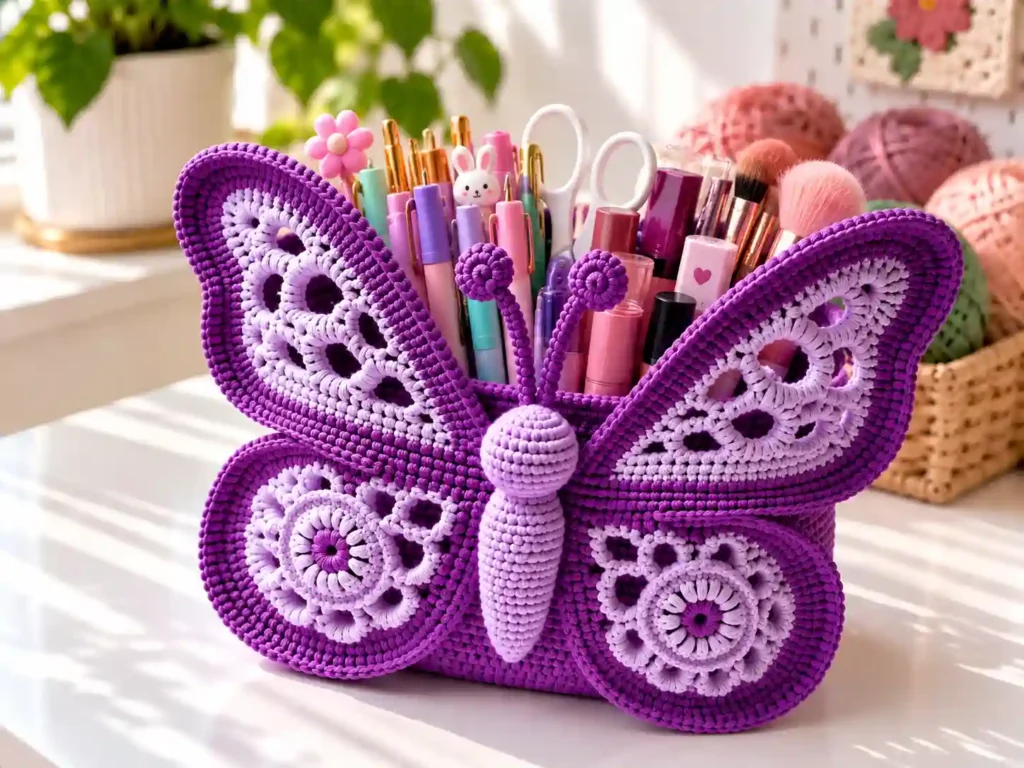
A crochet butterfly basket brings together delicate lacework and practical storage in one charming project. With its wing-like sides and sturdy base, this handmade piece works beautifully as a gift, a desk organizer, or a decorative accent on a shelf.
This pattern is designed to be approachable for confident beginners while still offering enough detail to keep experienced crocheters engaged. You will work the base in tight rounds, then build up the sides with open mesh and butterfly wing motifs that give the basket its signature look.
Why You Will Love This Crochet Butterfly Basket
- Beginner-friendly construction with clear round-by-round instructions.
- Uses basic stitches: chain, slip stitch, single crochet, double crochet, and treble crochet.
- Perfect size for small items like yarn, cosmetics, jewelry, or stationery.
- Scrap-yarn friendly if you match the recommended weight.
- Makes a thoughtful handmade gift basket idea for moms, friends, or fellow crafters.
- Customizable colors for seasonal decor or personal style.
- Portable project that works up quickly once the base is established.
Finished Size
Finished measurements were not provided in the reference material. Work a gauge swatch in your chosen yarn and hook to estimate the final size before starting the full basket.
Materials You Will Need
- Cotton yarn in your chosen color, such as violet cotton or a similar yarn.
- A crochet hook suitable for your yarn and tension.
- Yarn needle or tapestry needle.
- Sharp scissors.
- Stitch markers, optional but helpful for marking round starts.
- Blocking mat and pins, optional for final shaping.
Yarn Information
The design calls for a cotton yarn that gives the basket enough body to hold its shape while keeping the butterfly wings neat and visible. Cotton is especially useful for decorative baskets because it has less stretch than many soft yarns.
Using a heavier yarn will create a larger and more structured basket, while a finer yarn will give a smaller and more delicate result. Check your tension before beginning, especially if you want the finished basket to stand upright.
Crochet Hook
Choose a hook that creates a firm but comfortable fabric with your chosen yarn. If your stitches are very loose, try going down one hook size. If the fabric feels too stiff or difficult to work, move up slightly.
Crochet Abbreviations (US Terminology)
- ch: chain
- sl st: slip stitch
- sc: single crochet
- dc: double crochet
- tr: treble crochet
- st(s): stitch(es)
- sp(s): space(s)
- rep: repeat
- RS: right side
- WS: wrong side
Pattern Notes
- The base and lower sides are worked in continuous rounds.
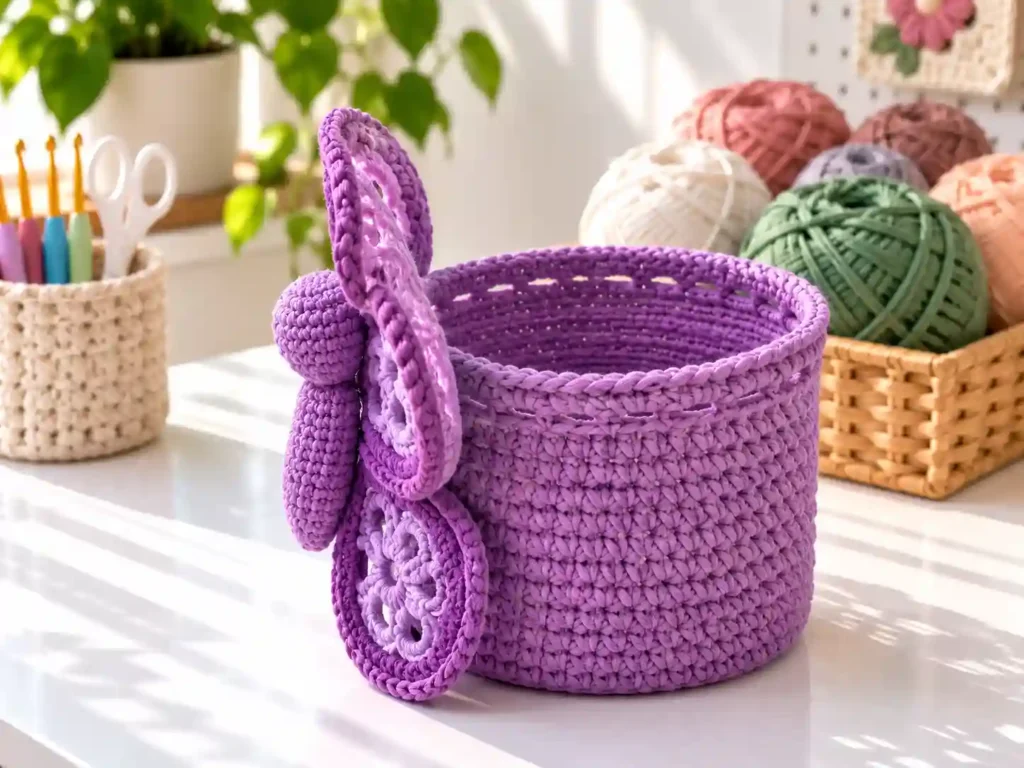
- Butterfly wings are made separately, then attached to the basket sides.
- Use a stitch marker to mark the first stitch of each round if you are working in a spiral.
- Keep your tension even to prevent the base from curling or the basket sides from flaring.
- Change colors at the end of a round by joining the new yarn color neatly.
- Weave in all ends securely to help the basket retain its shape.
Crochet Butterfly Basket Pattern
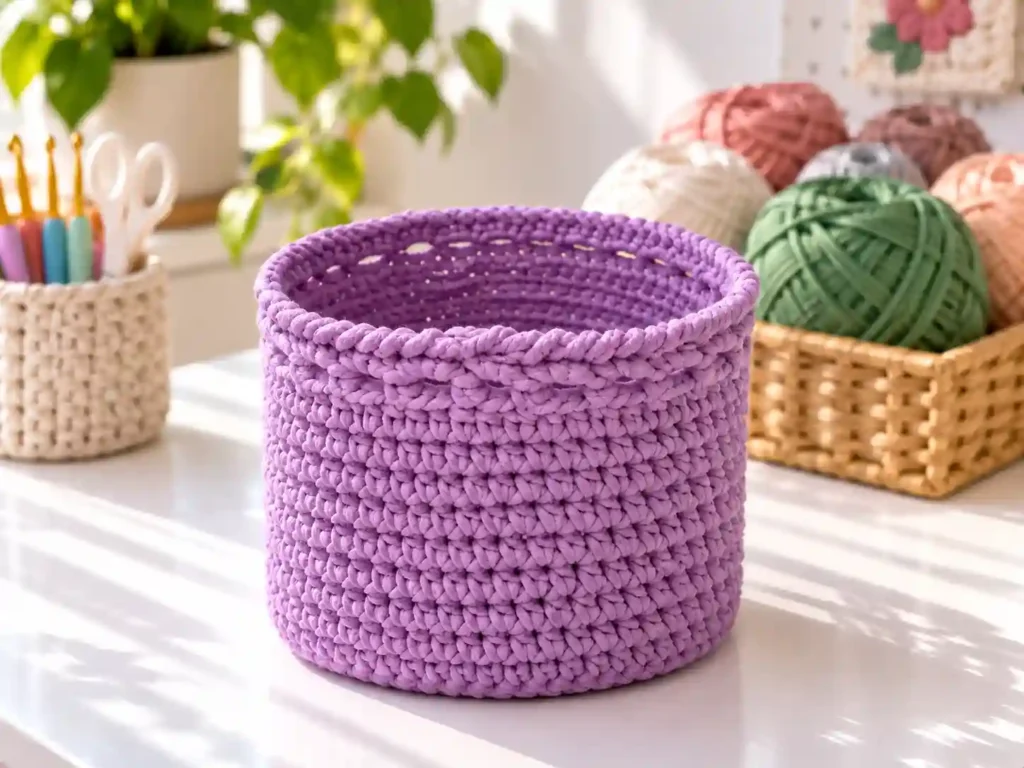
Part 1: Base and Lower Sides
Round 1: Ch 2, work 12 dc into the second chain from hook. Join with a sl st to the top of the beginning ch-3 if using a turning chain, or to the first dc if working without a turning chain. (12 sts)
Round 2: Ch 1, work 2 sc in each st around. Join with a sl st. (24 sts)
Round 3: Ch 1, [1 sc in next st, 2 sc in next st] rep around. Join with a sl st. (36 sts)
Round 4: Ch 1, [1 sc in next 2 sts, 2 sc in next st] rep around. Join with a sl st. (48 sts)
Round 5: Ch 1, sc in each st around. Join with a sl st. (48 sts)
Rounds 6 to 8: Ch 1, sc in each st around. Join with a sl st at the end of each round. (48 sts each round)
These rounds form the solid base and lower walls of the basket. Add or remove plain single crochet rounds if you want a taller or shorter basket body before beginning the wing section.
Part 2: Butterfly Wing Mesh Foundation
Round 9, mesh setup: Ch 4, counting as the first dc and ch 1. [1 dc in next st, ch 1, skip 1 st] rep around. Join with a sl st to the third chain of the beginning ch 4. You should have 24 dc and 24 ch-1 spaces.
Round 10: Ch 1, work [1 sc, ch 2, 1 sc] in each ch-1 space around. Join with a sl st. This creates small loops that will hold the butterfly wing motifs.
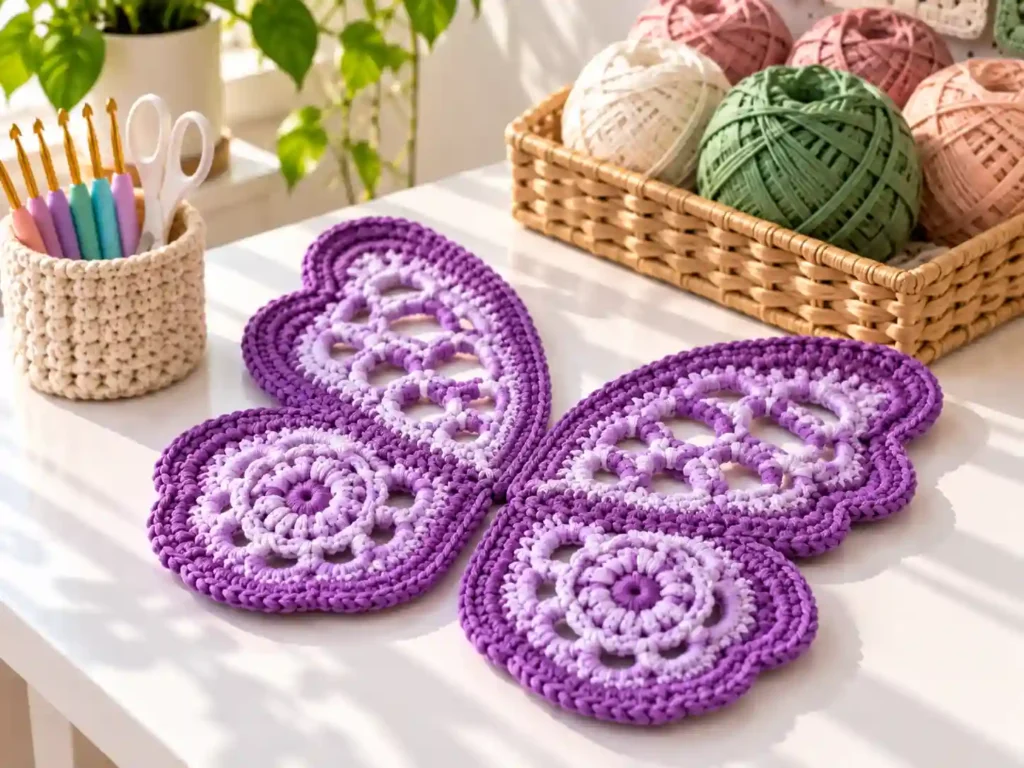
Part 3: Butterfly Wing Motifs, Make 4
Each wing is worked as a small lace motif and later sewn or crocheted onto the mesh foundation. Make 4 identical wings. You may also make 2 slightly larger and 2 slightly smaller wings if you want a more dimensional butterfly effect.
Wing Row 1: Ch 6, work 1 tr in the fourth chain from hook, [ch 2, 1 tr in next chain] twice. Turn.
Wing Row 2: Ch 3, counting as first dc. Work 2 dc in first ch-2 space, ch 2, work 3 dc in next ch-2 space, ch 2, work 1 dc in top of beginning ch 6. Turn.
Wing Row 3: Ch 1, work a scallop of [1 sc, 1 dc, 1 tr, 1 dc, 1 sc] in the center dc of the 3-dc group from the previous row. Fasten off, leaving a long yarn tail for sewing.
Repeat Wing Rows 1 to 3 three more times to make 4 wing motifs in total.
Part 4: Attaching the Wings
Position the 4 wing motifs evenly around the mesh section of the basket, placing 2 wings on each side. Use pins or stitch markers to check the spacing and symmetry before securing them permanently.
Use the yarn tails and a tapestry needle to sew each wing to the mesh foundation. Make small whip stitches through the ch-2 spaces of the wings and the ch-2 loops of Round 10. Secure and weave in the yarn ends on the inside of the basket.
Assembly
- Complete the basket base and lower sides through Round 8.
- Work the mesh foundation in Rounds 9 and 10.
- Crochet 4 butterfly wing motifs following Part 3.
- Arrange the wings symmetrically around the basket and pin them in place.
- Sew each wing securely to the mesh foundation using the yarn tails.
- Weave in all remaining yarn ends on the inside of the basket.
- Lightly block the basket if needed to smooth the base and shape the wings.
Finishing Touches
After weaving in the ends, gently shape the basket with your hands. If the wings look uneven, pin them into a balanced position on a blocking mat, lightly dampen the yarn, and allow the piece to dry fully before use.
If you want extra structure, use a suitable fabric stiffener on the finished basket. Test it first on a small, hidden area so you can make sure it does not affect the yarn color or texture.
Crochet Tips for Success
- Keep your tension consistent in the base to avoid a wobbly bottom.
- Count stitches at the end of each round until you feel confident with the pattern.
- Use stitch markers to identify the beginning of each round.
- If the wings curl too much, block them flat before attaching them to the basket.
- Keep the mesh foundation relaxed enough for the wings to sit neatly against it.
- Choose cotton yarn if you want the best structure and shape retention.
Variations to Try
- Use one color for the basket and another color for the butterfly wings.
- Make a mini version with finer yarn for a small decorative organizer.
- Add a few lightweight beads along the wing edges for a subtle sparkle.
- Create seasonal baskets with spring pastels, autumn shades, or festive colors.
- Use the butterfly wing motifs separately as appliques for bags, pillows, or blankets.
Common Problems and Troubleshooting
The Base Is Curling Upward
Make sure the increases are evenly placed in the first rounds. A tight tension can also make the base curl, so try using a slightly larger hook if the fabric feels too stiff.
The Basket Is Smaller Than Expected
A small result is usually caused by tight tension or a thinner yarn. Try a larger hook or a thicker yarn, and make a gauge swatch before beginning another basket.
The Stitch Count Is Incorrect in the Mesh Round
Count the double crochet stitches and chain spaces as you work around. If you find too many or too few spaces at the end, undo the round and check that every skipped stitch matches one chain space.
The Butterfly Wings Look Uneven
Block the wings before attaching them, then use pins or stitch markers to position them evenly. Attach the center area securely while leaving the outer wing edges free enough to keep their shape.
How to Use Your Finished Crochet Butterfly Basket
- Store crochet hooks, stitch markers, scissors, and other small craft supplies.
- Keep jewelry, hair accessories, or cosmetics organized on a dressing table.
- Use it as a decorative centerpiece filled with faux flowers or dried botanicals.
- Give it as a handmade basket for new moms, friends, teachers, or fellow crafters.
- Display it on a shelf as a decorative handmade accent.
Care Instructions
Hand wash the Crochet Butterfly Basket gently in cool water with mild detergent. Do not twist or wring the crochet fabric. Press out water with a clean towel, reshape the basket while damp, and lay it flat to dry away from direct sunlight and heat.
Store the basket in a dry place where it will not be crushed. If it loses its shape, lightly dampen it, reshape the base and wings, then allow it to dry completely.
Frequently Asked Questions
Can a beginner make this Crochet Butterfly Basket?
Yes. The basket uses familiar basic stitches, although the wing motifs require some patience. Read through the instructions first and practice the wing section with a small yarn sample if needed.
What yarn works best for this pattern?
Cotton yarn is a good choice because it creates a firm fabric and helps the basket hold its shape. A smooth yarn also makes the lace-like wing details easier to see.
Can I use a different hook size?
Yes. A larger hook will create a looser and bigger fabric, while a smaller hook will make the basket denser and firmer. Choose the hook that gives you an even fabric with your selected yarn.
Can I make the basket larger or smaller?
You can change the size by adding or removing increase rounds in the base, adding more straight rounds for height, or changing your yarn and hook combination.
Do I need to block the finished basket?
Blocking is optional, but it can help the butterfly wings look more even and symmetrical. It is especially useful if the wings curl or the basket base needs gentle reshaping.
How should I wash the finished Crochet Butterfly Basket?
Wash it by hand in cool water with mild soap, reshape it while damp, and lay it flat to dry. Avoid machine washing because it can stretch the basket or distort the wing details.
Conclusion
The Crochet Butterfly Basket is a lovely mix of practical storage and delicate handmade design. Its solid base provides a useful place for small items, while the lace-style wings turn it into a special decorative piece for your home or a thoughtful handmade gift.
Choose colors that make you happy, keep the stitches even, and take your time placing the wings. Your finished basket can be as soft and subtle or as bright and playful as you want it to be.