Why Crochet Roses Make the Perfect Handmade Gift
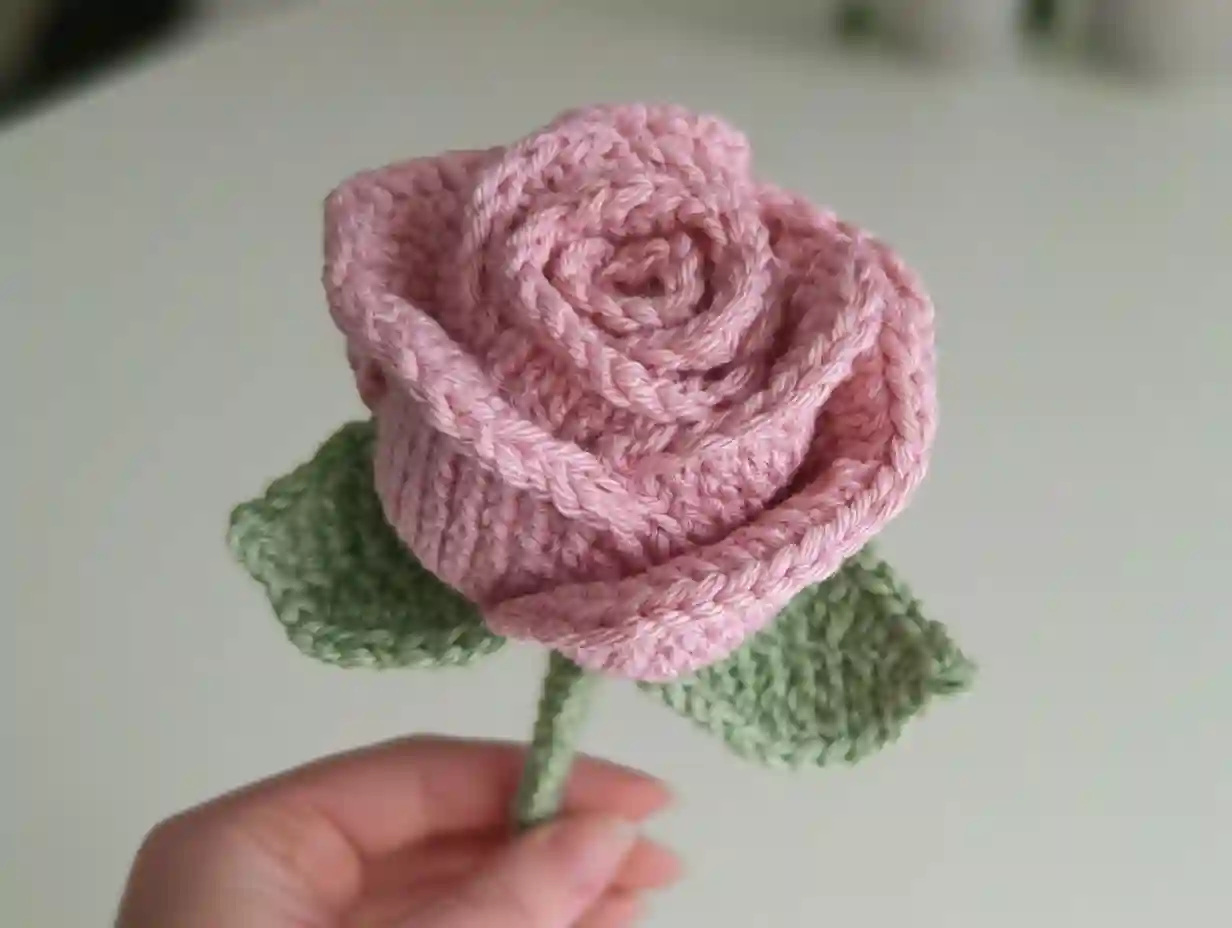
There’s something magical about receiving flowers that will never wilt. A crochet rose bouquet combines the timeless romance of roses with the warmth of handmade craftsmanship. This crochet rose bouquet free pattern guides you through creating stunning 3D roses that look remarkably lifelike yet last forever.
Whether you’re celebrating an anniversary, brightening someone’s birthday, or adding a touch of handmade beauty to your own home, these roses deliver impact without the maintenance. The layered petal construction creates depth and dimension that flat appliqués simply can’t match.
Best of all, this project works beautifully as a scrap yarn buster. Those partial skeins of cotton or acrylic yarn in your stash? They’re perfect for this colorful crochet roses pattern.
Why You’ll Love This Crochet Rose Bouquet
- Beginner-friendly construction using basic stitches worked in continuous rounds
- Customizable colors to match any occasion or décor scheme
- Scrap-yarn friendly project perfect for using up partial skeins
- No blocking required — roses hold their shape naturally
- Versatile finishing works as bouquets, centerpieces, or gift toppers
- Quick project that comes together faster than you might expect
- Lasts indefinitely unlike fresh flowers that fade within days
Finished Size
Each completed rose measures approximately 3 to 4 inches across when fully assembled, depending on your yarn weight and tension. The stem extends about 10 to 12 inches, making it ideal for arranging in standard vases. A bouquet of 5 to 7 roses creates a full, gift-worthy arrangement.
Materials You’ll Need
Yarn
- Rose petals: Cotton or cotton-blend yarn in your chosen colors (approximately 50 to 75 yards per rose)
- Leaves and sepals: Green yarn (approximately 30 yards per rose)
- Stem wrapping: Additional green yarn or floral tape
Popular color choices include classic red, soft pink, creamy white, sunny yellow, or even unconventional shades like lavender and coral for a modern twist.
Crochet Hook
- 2.5 mm to 3.5 mm crochet hook (size depends on your yarn weight and desired tightness)
- Smaller hooks create tighter, more defined petals
- Larger hooks produce softer, more relaxed roses
Additional Supplies
- Stitch markers to track round beginnings
- Tapestry needle for weaving ends
- Sharp scissors
- Floral wire (18 to 22 gauge) for stem reinforcement
- Hot glue gun and glue sticks for assembly
- Wire cutters
- Optional: floral tape for professional stem finishing
Crochet Abbreviations (US Terminology)
This pattern uses standard US crochet terminology throughout.
- ch – chain
- sc – single crochet
- hdc – half double crochet
- dc – double crochet
- tr – treble crochet
- sl st – slip stitch
- st – stitch
- sts – stitches
- sk – skip
- inc – increase (2 sc in same stitch)
- magic ring – adjustable starting loop
Pattern Notes
Before diving into the crochet rose free pattern instructions, keep these construction details in mind:
- Worked in continuous rounds: Do not join rounds with slip stitches unless specifically instructed. Place a stitch marker in the first stitch of each round to track your progress.
- Petal shaping: The final rounds of each petal size create the characteristic ruffled edge that gives roses their realistic appearance.
- Tension matters: Consistent tension throughout ensures even petal shapes. If your petals curl excessively, try loosening your grip slightly.
- Wire integration: When adding wire to leaves, crochet directly over the wire as you work your stitches. This provides structure without visible hardware.
- Assembly order: Construct all petals, leaves, and sepals before beginning assembly. This streamlines the finishing process.
Crochet Rose Bouquet Free Pattern Instructions
Large Petals (Make 3 per rose)
Begin with a magic ring in your chosen petal color.
Round 1: Work 6 sc into the magic ring. Place marker in first sc. (6 sts)
Round 2: Work 2 sc in each stitch around. (12 sts)
Round 3: 1 sc in next stitch, 2 sc in next stitch; repeat from * to * around. (18 sts)
Round 4: 1 sc in next 2 stitches, 2 sc in next stitch; repeat from * to * around. (24 sts)
Round 5: 1 sc in next 3 stitches, 2 sc in next stitch; repeat from * to * around. (30 sts)
Round 6: 1 sc in next 4 stitches, 2 sc in next stitch; repeat from * to * around. (36 sts)
Round 7: 1 sc in next 5 stitches, 2 sc in next stitch; repeat from * to * around. (42 sts)
Round 8: 1 sc in next 6 stitches, 2 sc in next stitch; repeat from * to * around. (48 sts)
Round 9 (shaping round): 1 sc in next 7 stitches, 2 sc in next stitch; repeat from * to * around. (54 sts)
Round 10 (ruffle edge): 1 sc in next 3 stitches, work (1 dc, 1 ch, 1 dc) in next stitch; repeat from * to * around. Join with sl st to first sc. Fasten off, leaving a 6-inch tail for sewing.
Medium Petals (Make 3 per rose)
Begin with a magic ring in your chosen petal color.
Rounds 1 through 8: Follow the same instructions as Large Petals through Round 8. (48 sts)
Round 9 (ruffle edge for medium): 1 sc in next 5 stitches, work (1 dc, 1 ch, 1 dc) in next stitch; repeat from * to * around. Join with sl st to first sc. Fasten off, leaving a 6-inch tail.
Small Petals (Make 3 per rose)
Begin with a magic ring in your chosen petal color.
Rounds 1 through 6: Follow the same instructions as Large Petals through Round 6. (36 sts)
Round 7 (ruffle edge for small): 1 sc in next 4 stitches, work (1 dc, 1 ch, 1 dc) in next stitch; repeat from * to * around. Join with sl st to first sc. Fasten off, leaving a 6-inch tail.
Rose Sepal (Make 1 per rose)
Using green yarn, begin with a magic ring.
Round 1: Work 6 sc into the magic ring. (6 sts)
Round 2: Work 2 sc in each stitch around. (12 sts)
Round 3: 1 sc in next stitch, 2 sc in next stitch; repeat from * to * around. (18 sts)
Round 4: Work 1 sc in each stitch around. (18 sts)
Round 5 (sepal points): Chain 5, starting in second chain from hook work 1 sl st, 1 sc, 1 hdc, 1 dc; skip 2 stitches on Round 4, work 1 sl st in next stitch; repeat from * to * five more times around. Join with sl st to beginning. Fasten off, leaving a tail for attachment.
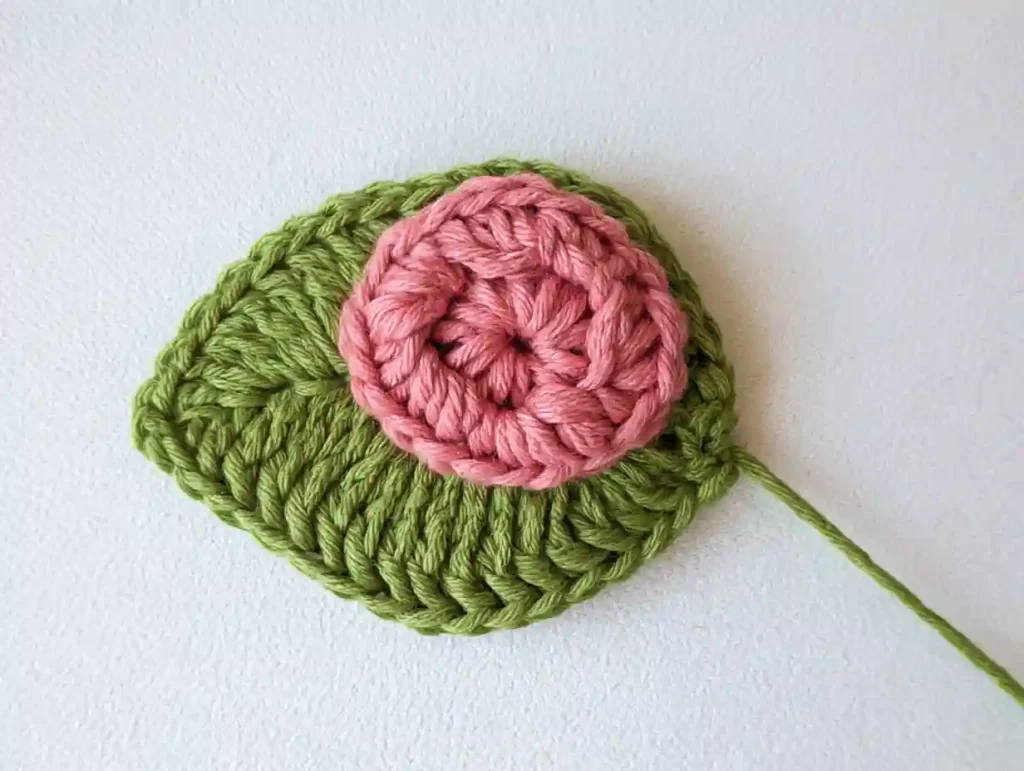
Rose Leaves (Make 3 per rose)
Using green yarn and floral wire cut to approximately 6 inches.
Foundation chain: Chain 13.
Row 1: Working in second chain from hook, 1 sc in each of next 10 chains, 3 sc in last chain. Rotate to work along opposite side of foundation chain. Work 1 sc in each of next 10 chains, 2 sc in last chain. Join with sl st to first sc. Turn. (26 sts total)
Row 2 (adding wire): Lay wire along edge of leaf. Work 1 sc, 1 hdc, 2 dc, 3 tr, 2 dc, 1 hdc, 1 sc along first side, working over wire to encase it. Work 3 sc in tip stitch. Continue along opposite side with 1 sc, 1 hdc, 2 dc, 3 tr, 2 dc, 1 hdc, 2 sc. Join with sl st. Fasten off, leaving a 4-inch tail for wrapping.
Assembly Instructions
Follow these steps to bring your crochet rose bouquet to life:
Step 1: Prepare the Leaves
Wrap each leaf’s tail yarn tightly around the floral wire stem, securing with a small dot of hot glue at the base. Arrange all three leaves around the wire, spacing them evenly. Wrap additional green yarn or floral tape around the wire to unify the leaves into a single stem section.
Step 2: Build the Rose Center
Start with the three small petals. Arrange them in a tight cluster, overlapping slightly to form the rose’s closed center. Apply a small amount of hot glue to the base of each petal and press firmly around the top of your wire stem. Hold for 10 to 15 seconds until secure.
Step 3: Add Medium Petals
Position the three medium petals around the small petal cluster, offsetting them so they don’t align directly behind the inner layer. This creates natural-looking fullness. Glue each petal base securely, gently curving the petals outward as the adhesive sets.
Step 4: Attach Large Petals
Arrange the three large petals as the outermost layer, again offsetting from the layers beneath. These should have the most open, relaxed curve. Secure with hot glue at the base, allowing the ruffled edges to flare naturally.
Step 5: Add the Sepal
Position the green sepal beneath the rose, with the pointed tips extending downward around the base of the petals. Apply glue to the sepal’s center and press firmly against the flower base. Wrap the sepal’s tail yarn around the stem to conceal the join.
Step 6: Finish the Stem
Wrap the entire length of the floral wire stem with green yarn or floral tape, starting just below the sepal and continuing to the bottom. Secure the end with a dot of glue. If desired, attach the leaf section partway down the stem by wrapping both stem sections together with additional yarn or tape.
Finishing Touches
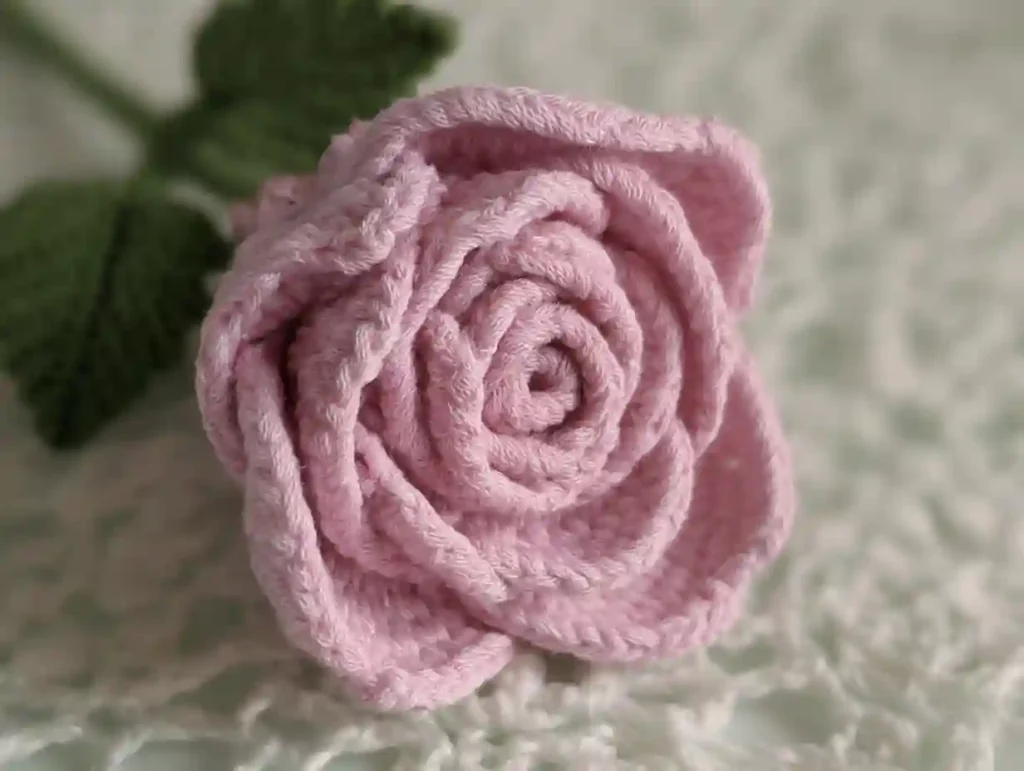
Weave in any remaining loose ends using your tapestry needle. Gently shape each petal with your fingers to achieve the desired openness — tighter for a bud-like appearance, or more relaxed for a fully bloomed rose.
For extra stability in bouquets, consider inserting the finished stems into floral foam inside your vase, or arrange them in a decorative container filled with decorative stones or dried beans.
Crochet Tips for Success
- Count your stitches: Mark the first stitch of each round clearly. Losing count is the most common cause of misshapen petals.
- Consistent tension: Practice maintaining even tension throughout each petal. Uneven tension creates wavy or curled edges.
- Test your hook size: Make one sample petal before committing to a full rose. Adjust hook size if petals are too stiff or too floppy.
- Wire handling: When crocheting over wire, keep gentle tension on both the yarn and wire to prevent buckling.
- Glue sparingly: A little hot glue goes a long way. Excess glue can stiffen petals or create visible bumps.
Pattern Variations
Once you’ve mastered the basic rose flower amigurumi crochet pattern, try these modifications:
- Ombré roses: Use gradually lighter or darker shades for each petal layer
- Mini roses: Work with fingering weight yarn and a 1.5 mm hook for delicate boutonnieres
- Giant statement roses: Use bulky weight yarn and a 5 mm hook for dramatic décor pieces
- Two-tone petals: Change colors mid-round for striped or variegated effects
- Scented roses: Add a drop of essential oil to the yarn before assembly for subtle fragrance
- Embellished centers: Glue small pearls or beads in the rose center for vintage appeal
Common Problems and Troubleshooting
Problem: Petals are curling inward excessively.
Solution: This usually indicates tension that’s too tight. Try consciously relaxing your grip on the yarn, or increase your hook size by 0.5 mm. You can also gently stretch and reshape finished petals with your fingers.
Problem: Rose looks too flat or two-dimensional.
Solution: Ensure you’re offsetting each petal layer during assembly rather than stacking them directly behind one another. Gently curve petals outward as you glue them, and consider adding light stuffing to the innermost petals for extra dimension.
Problem: Stitch count doesn’t match pattern.
Solution: Stop and recount immediately. Use a different colored stitch marker every few rounds to make errors easier to spot. If you’ve already completed several rounds with an incorrect count, it’s often better to restart than to try compensating later.
Problem: Leaves are too floppy.
Solution: Ensure you’re crocheting firmly over the wire. If needed, use a slightly thicker gauge wire (18 instead of 20) or add a second wire strand for extra support.
Problem: Hot glue shows through petals.
Solution: Apply glue only to the very base of petals where they overlap. Use a toothpick to spread glue precisely, and press petals together firmly so adhesive bonds without seeping outward.
How to Use Your Finished Crochet Rose Bouquet
These free crochet rose patterns open up numerous creative possibilities:
- Wedding bouquets for brides seeking non-traditional, keepsake flowers
- Centerpieces for dinner parties, showers, or anniversary celebrations
- Nursery décor in soft pastels for a timeless baby room accent
- Teacher or hostess gifts that show thoughtfulness and effort
- Valentine’s Day presents that outlast any fresh arrangement
- Memorial tributes for gravesites or remembrance displays
- Photography props for newborn sessions or product flat lays
- Wreath embellishments for spring or summer door decorations
- Gift wrapping accents attached to boxes or bags for extra charm
- Cake toppers for rustic or handmade-themed weddings
Care Instructions
Crochet roses require minimal maintenance to stay beautiful:
- Dusting: Gently shake or use a soft brush to remove dust accumulation
- Spot cleaning: Dab lightly with a damp cloth if needed; avoid soaking
- Storage: Keep in a covered display case or cabinet if not on permanent display
- Reshaping: Gently reform petals with your fingers if they become compressed
- Avoid direct sunlight: Prolonged UV exposure may fade yarn colors over time
- Keep away from heat: Hot air vents or radiators can distort fiber shape
With proper care, your crochet rose bouquet will remain vibrant for years.
Frequently Asked Questions
Can a complete beginner make this crochet rose bouquet free pattern?
Yes! If you can work basic stitches in continuous rounds and follow stitch counts, you have the skills needed. The construction is straightforward, though assembly requires patience.
What yarn works best for crochet roses?
Cotton or cotton-blend yarns provide excellent stitch definition and hold shape well. Acrylic works too but may be slightly less structured. Avoid very fuzzy or textured yarns that obscure stitch details.
Can I use a different hook size than recommended?
Absolutely. A smaller hook creates tighter, more formal roses. A larger hook produces softer, more relaxed blooms. Just ensure your hook matches your yarn weight appropriately.
How do I make the roses larger or smaller?
To enlarge, add more increase rounds before the ruffle edge, or use heavier yarn with a larger hook. To reduce size, work fewer increase rounds or switch to finer yarn and a smaller hook.
Can I sell finished roses made from this free crochet rose pattern?
Yes, you may sell finished items made from this pattern. Please credit the pattern source when possible, but do not resell or redistribute the pattern instructions themselves.
How many roses should I make for a full bouquet?
Five to seven roses create a nicely filled arrangement. For a more dramatic statement piece, consider 9 to 11 roses with varied heights and angles.
Do I need to stuff the roses?
No stuffing is required. The layered petal construction creates natural dimension. However, you can add minimal polyester fiberfill to the innermost petals if you prefer extra fullness.