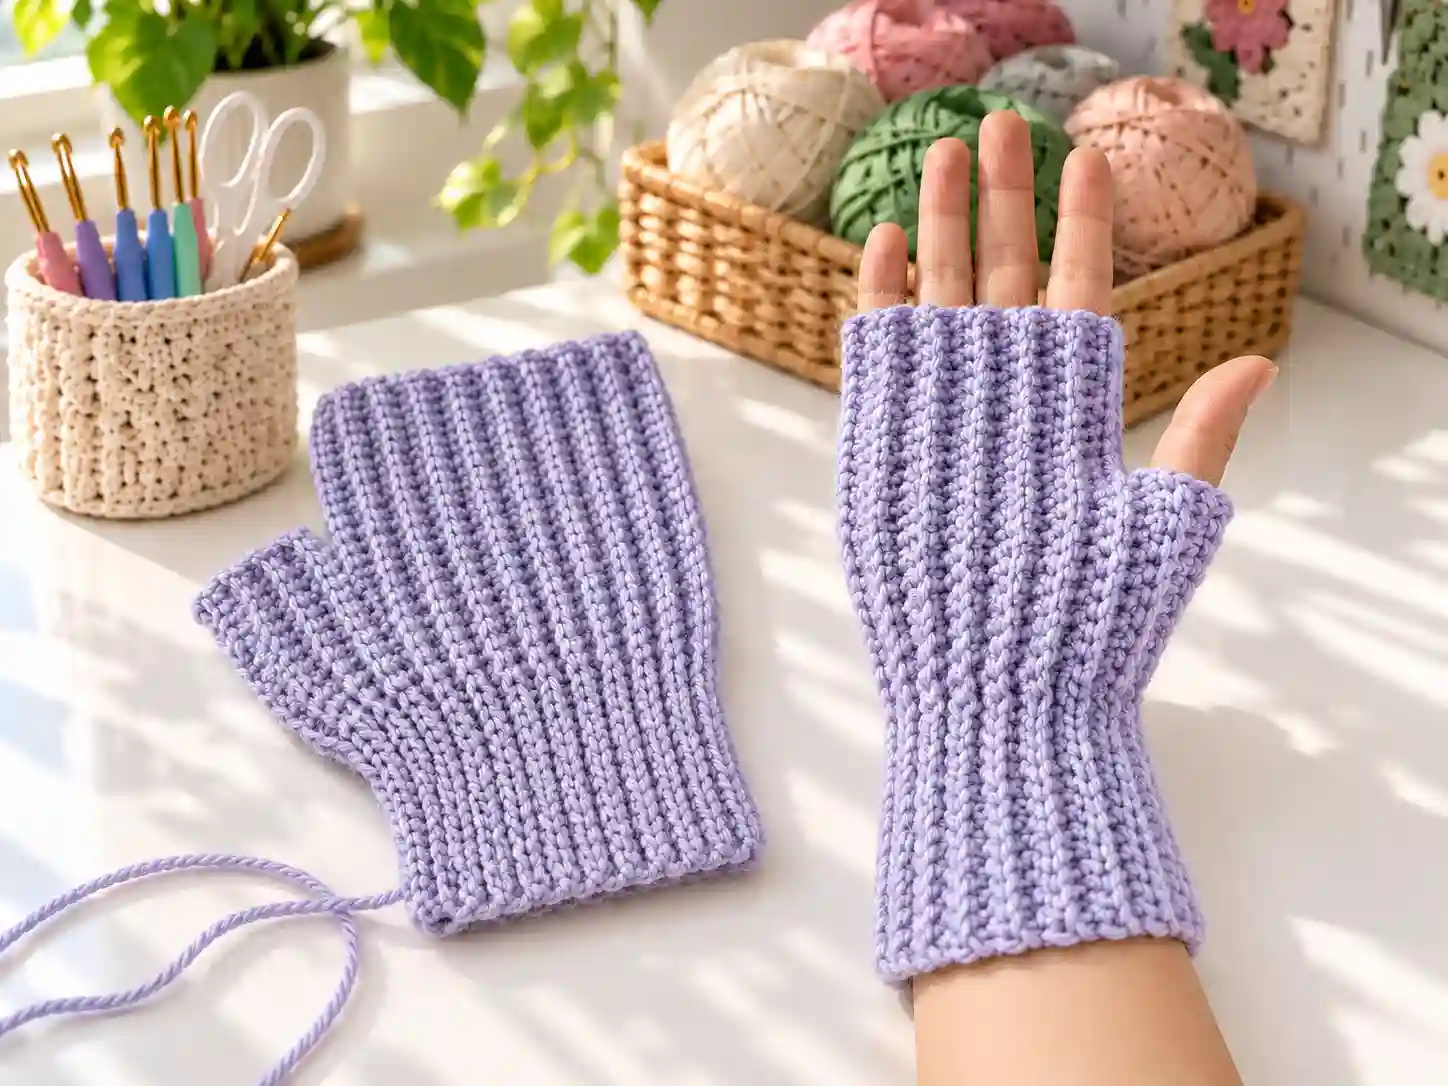
Ribbed fingerless gloves are one of those crochet projects that feel practical the moment they are finished. They keep palms and wrists warm while leaving fingers free for typing, texting, cooking, or holding a warm mug. This free crochet ribbed fingerless gloves pattern focuses on a simple, stretchy ribbed texture that works beautifully for everyday winter wear.
The design is built around a snug cuff and an open thumb area, so the gloves stay comfortable without feeling restrictive. Because the construction is straightforward, this is a satisfying project for crocheters who enjoy wearable accessories and want something useful rather than purely decorative.
Why You’ll Love This Crochet Project
- The ribbed fabric has natural stretch, which helps the gloves fit comfortably.
- Fingerless gloves work up faster than full mittens because there are no individual fingers to shape.
- They are easy to customize with different yarn colors and cuff lengths.
- The finished gloves make thoughtful handmade gifts for cold-weather seasons.
- They are small enough to carry as a portable project.
- Leftover yarn from hats, scarves, or blankets can often be used for a pair.
Finished Size
Exact finished measurements were not provided with the verified pattern information for this design. Before beginning, check the intended recipient’s hand circumference and wrist measurement, then adjust your hook size or yarn choice as needed to achieve a comfortable fit.
Materials You’ll Need
- Yarn suitable for warm, flexible fingerless gloves
- 4.5 mm crochet hook
- Tapestry needle
- Scissors
- Stitch markers, optional but helpful for marking the thumb opening
Yarn Information
A smooth worsted or aran-weight yarn is a dependable choice for ribbed hand warmers because it creates a fabric with enough body to hold its shape while still stretching over the hand. Wool and wool blends are especially cozy, while acrylic yarn is easy to care for and widely available.
The exact yarn amount was not provided, so choose a yarn quantity based on the label guidance for a similar accessory and keep enough yardage for two matching gloves. Solid colors show ribbing clearly, while gently variegated yarn adds subtle movement without hiding the texture.
Crochet Hook
This pattern calls for a 4.5 mm crochet hook. If your tension is naturally tight, the gloves may feel stiff; if it is loose, the fabric may become too open. Adjusting by one hook size can make a noticeable difference in fit and drape.
Crochet Abbreviations
This pattern uses US crochet terminology.
- ch = chain
- st = stitch
- sts = stitches
- sc = single crochet
- hdc = half double crochet
- dc = double crochet
- sl st = slip stitch
- BLO = back loop only
- rep = repeat
Pattern Notes
- The ribbed cuff is commonly worked flat in rows, then joined at the side to form a tube.
- Working stitches in the back loop only creates the raised ridges that give ribbing its stretch.
- Keep your tension even, especially along the cuff edges, so the two ends join neatly.
- Use a stitch marker to mark where the thumb opening begins and ends.
- Make the first glove completely, then use it as a physical reference while making the second.
- Fasten off securely and weave in all yarn tails with a tapestry needle.
Crochet Pattern
The complete row-by-row and round-by-round stitch counts for this specific design were not supplied in the verified pattern information, so they are not included here. Do not guess stitch counts, because an incorrect count can change the fit of the cuff, palm, and thumb opening.
Part 1: Ribbed Cuff
Begin by crocheting a flat ribbed panel using back-loop stitches. The length of the foundation chain determines the height of the cuff, while the number of rows determines how the cuff wraps around the wrist.
Work the ribbing until the panel is long enough to fit comfortably around the wrist with slight stretch. Bring the short ends together and join them to form a circular cuff, taking care not to twist the ribbing.
Part 2: Hand Section
With the cuff joined, work around the open edge to form the hand section. Maintain the ribbed texture or transition to a smoother stitch pattern for the palm, depending on the construction of the design you are following.
Continue working in rounds until the fabric reaches the base of the fingers. The glove should cover the hand comfortably while leaving the fingers uncovered.
Part 3: Thumb Opening
Create the thumb opening by leaving a small section of stitches unworked or by forming a chain space across the required number of stitches. The opening should sit naturally at the side of the hand and allow the thumb to move freely.
After forming the opening, continue working the remaining rounds to complete the upper edge of the glove. Repeat the entire process to make the second glove, mirroring the thumb placement if your chosen construction requires it.

Assembly
- Check that both gloves are the same length before fastening off.
- Match the ribbing direction on both cuffs so the finished pair looks consistent.
- Close any side seams securely using a tapestry needle or slip stitches.
- Confirm that the thumb openings are positioned comfortably and symmetrically.
- Weave in all remaining ends along the inside of the gloves.
Finishing Touches
Once the second glove is complete, gently shape the ribbing with your hands. Ribbed crochet often looks best after a light blocking, especially if the yarn is wool or a natural blend. Lay the gloves flat, smooth the cuffs into alignment, and allow them to dry fully before wearing.
Avoid pressing synthetic yarn with a hot iron. If shaping is needed, use gentle steam from a safe distance or simply reshape the gloves while they are slightly damp.
Crochet Tips
- Work a small ribbing swatch first to check how much the fabric stretches.
- Count stitches at the end of every few rows to catch mistakes early.
- If the cuff is too tight, try a larger hook or add stitches in a multiple that preserves the ribbing repeat.
- If the cuff is too loose, use a smaller hook or reduce stitches while keeping the rib pattern intact.
- Keep the thumb opening wide enough for comfortable movement but not so wide that cold air reaches the palm.
- Use the first glove as a template for the second to keep the pair even.
Variations
- Use a deep burgundy, forest green, or charcoal yarn for a classic winter look.
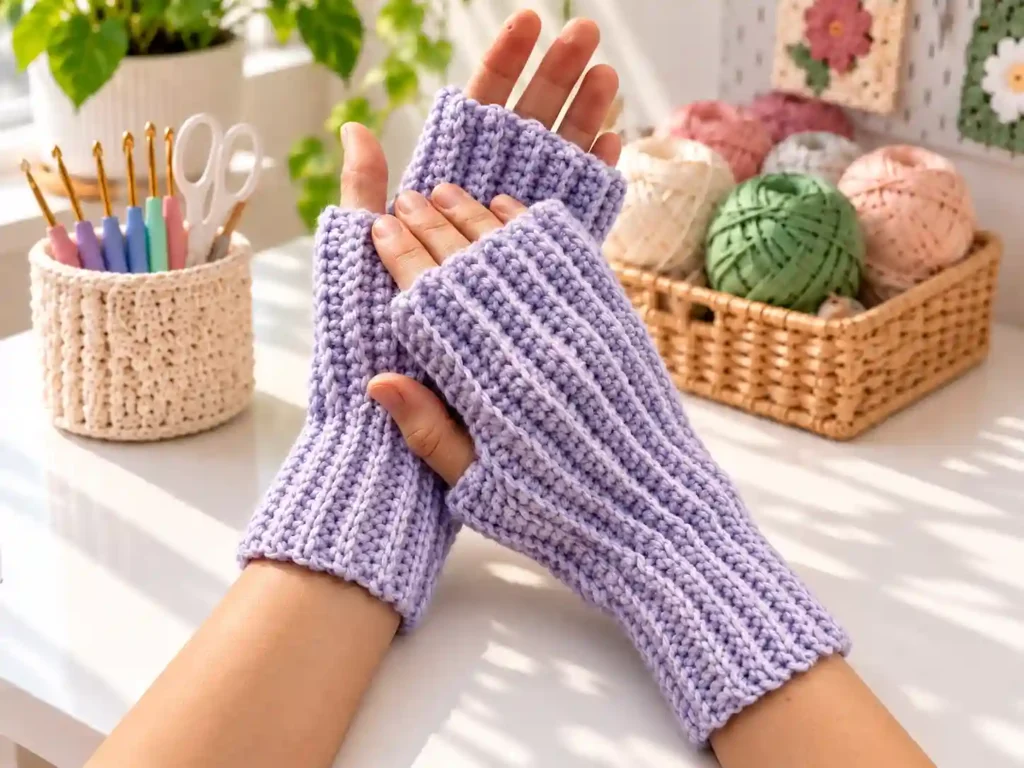
- Choose a soft pastel shade for lightweight spring hand warmers.
- Add a contrasting round of single crochet around the top edge for a tidy finish.
- Make the cuffs longer for extra wrist coverage.
- Use self-striping yarn for a colorful pair without changing colors manually.
- Sew on small wooden buttons along the outer cuff edge for a simple decorative detail.
Common Problems and Troubleshooting
The cuff does not stretch enough
Tight tension or a hook that is too small can reduce the elasticity of back-loop ribbing. Try a larger hook or loosen your tension slightly, then check the stretch again before continuing.
The glove twists when joined
This usually happens when the ribbed panel is joined with a twist in it. Lay the panel flat, align the short ends carefully, and make sure the right side of the ribbing faces outward before joining.
The thumb opening feels too small
A cramped thumb opening can make the whole glove uncomfortable. Before fastening off, try the glove on and adjust the opening by adding stitches or widening the chain space in the next attempt.
The two gloves are different sizes
Small differences in tension can add up over many rows. Count rows and stitches for both gloves, and compare them side by side before weaving in the final ends.
How to Use the Finished Crochet Project
Ribbed fingerless gloves are ideal for cool mornings, chilly offices, car rides, and outdoor walks when you still need use of your fingers. They pair well with coats, cardigans, and oversized sweaters, and they make a practical last-minute gift during the winter season.
They also work well as part of a handmade gift set alongside a matching ribbed beanie, cowl, or headband.
Care Instructions
Follow the care instructions on your yarn label. Wool gloves usually benefit from hand washing in cool water and drying flat, while many acrylic yarns can tolerate gentle machine washing. Always reshape the ribbing after washing and avoid hanging the gloves, since the weight of wet yarn can stretch them out of shape.
Frequently Asked Questions
Can a beginner make ribbed fingerless gloves?
Yes. Ribbed fingerless gloves use familiar basic stitches, and the main skills to practice are working in the back loop only, joining the cuff evenly, and forming a neat thumb opening.
What yarn works best for this free crochet ribbed fingerless gloves pattern?
A smooth worsted or aran-weight yarn is a good starting point. Choose a fiber that feels comfortable against the skin and has enough elasticity to support the ribbed texture.
Can I use a different hook size?
Yes, but change the hook size only after checking the fit. A larger hook creates a looser, more flexible glove, while a smaller hook creates a denser fabric.
How do I make the gloves larger or smaller?
Adjust the number of cuff rows to change the circumference and adjust the foundation chain to change the cuff height. Keep any ribbing repeat consistent so the texture remains even.
Why is my ribbing curling?
Some curling can happen while the piece is still flat. Light blocking and joining the panel into a tube usually help the fabric settle into its intended shape.
Can I make these gloves for gifts?
Absolutely. Fingerless gloves are useful, quick to personalize, and easy to match to someone’s favorite winter coat or accessory colors.
How should I wash crochet fingerless gloves?
Use the yarn label as your guide. For most handmade gloves, gentle washing and drying flat is the safest approach.
Conclusion
This free crochet ribbed fingerless gloves pattern is a cozy, wearable project with plenty of room for color and fit adjustments. Once you understand how the ribbed cuff, hand section, and thumb opening work together, you can make pair after pair in different yarns for yourself or as gifts. Pick a yarn you love, keep your ribbing even, and enjoy the satisfying process of turning a simple ball of yarn into something warm and useful.