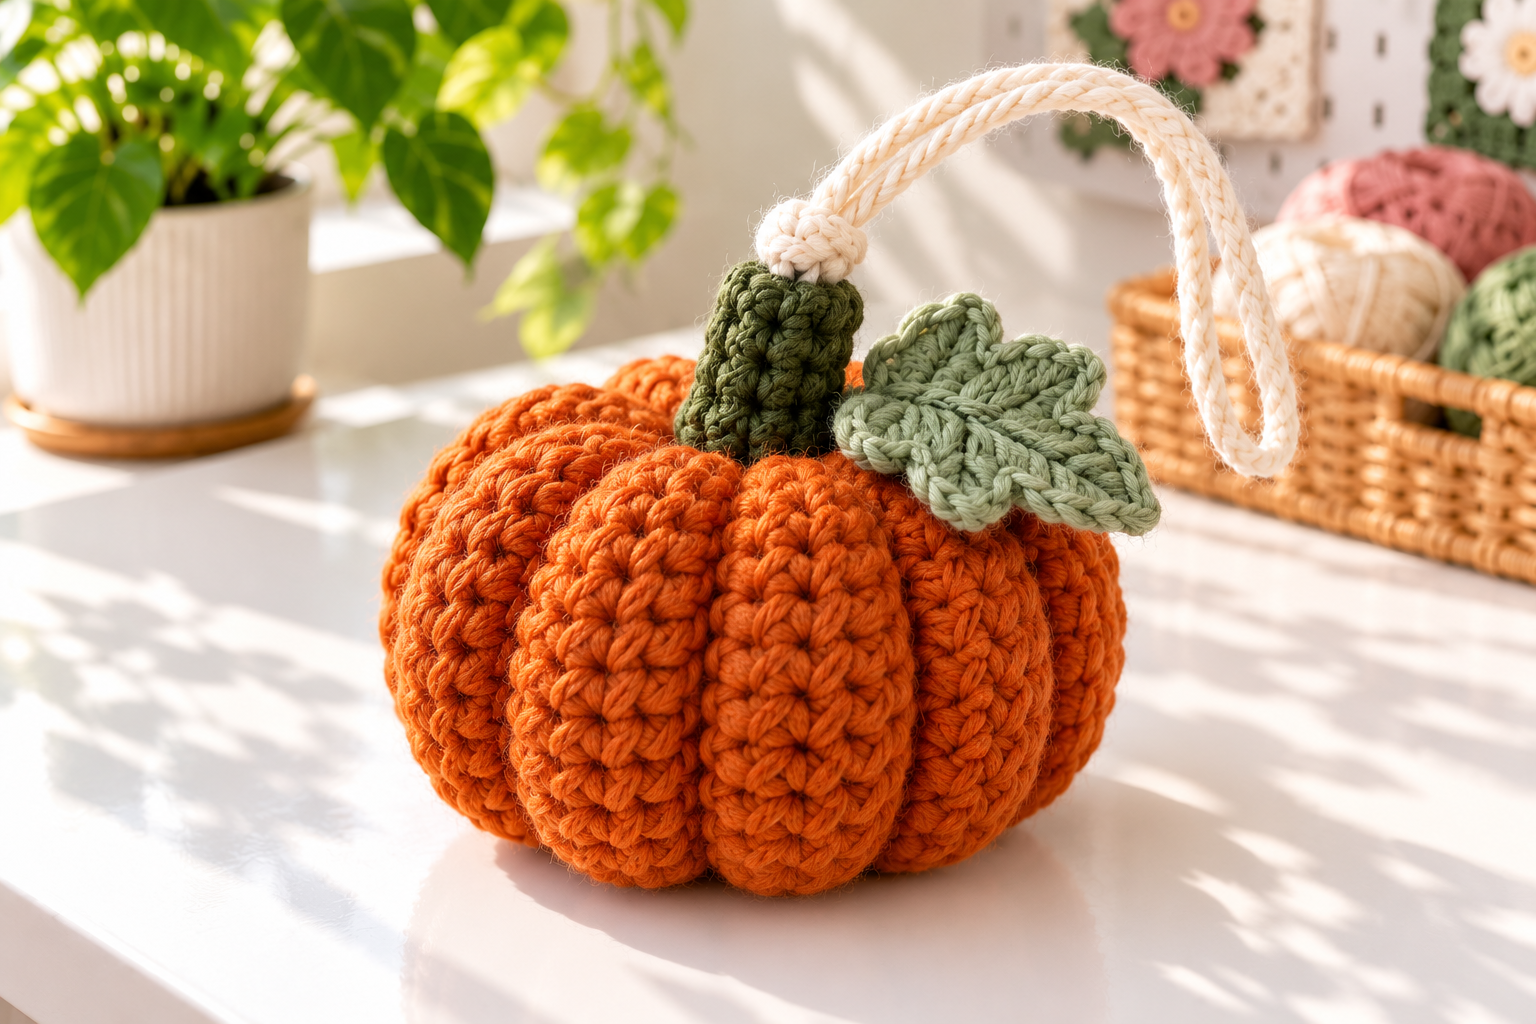
These crochet pumpkin Halloween decorations are small, soft, and quick enough to finish in one relaxed evening. The ribbed pumpkin begins as a simple rectangle, so there are no complicated rounds to count. Add a stem, leaf, and hanging loop to turn it into a cheerful fall ornament for a wall hook, bag, seasonal garland, or carefully placed car charm.
This original beginner-friendly pattern is also a useful scrap yarn crochet project. Make one classic orange pumpkin, or crochet a whole set in mustard, cream, rust, and sage for a modern pumpkin theme.
Easy Crochet Pumpkin Decoration Pattern
The finished pumpkin measures about 3½ inches (9 cm) wide, not including the hanging loop. Gauge is not critical. A slightly firm fabric is best because it keeps the stuffing from showing through the stitches.
Materials
- Worsted-weight yarn in orange, cream, or mustard
- Small amounts of green and brown yarn
- 4 mm crochet hook
- Fiberfill stuffing
- Yarn needle and scissors
- Optional cream yarn or cotton cord for the hanging loop
Abbreviations (US Terms)
- ch: chain
- sc: single crochet
- hdc: half double crochet
- dc: double crochet
- sl st: slip stitch
- BLO: back loop only

Step 1: Crochet the Ribbed Rectangle
With the main pumpkin color, ch 17.
Row 1: Sc in the second ch from the hook and in every ch across. You should have 16 stitches. Ch 1 and turn.
Rows 2–24: Sc in the BLO of every stitch across. Ch 1 and turn after each row, except the final row.
The unused front loops create stretchy vertical ridges. Your rectangle should wrap into a short tube without being pulled tightly. If your yarn or tension is different, add or remove two rows until the first and last rows meet comfortably. Fasten off, leaving a long tail for seaming.
Step 2: Seam and Stuff the Pumpkin
Fold the rectangle so the first and last rows meet. Use the long tail and a yarn needle to whipstitch those short edges together. Turn the tube so the seam is inside.
Thread another length of matching yarn around one open edge, passing under the end stitch of every ridge. Pull firmly to gather the opening and secure it with several stitches. This becomes the bottom.
Add fiberfill a little at a time. Keep the center soft rather than tightly packed; a lightly stuffed shape is easier to flatten into a pumpkin. Gather the second opening in the same way. Before closing it completely, add or remove stuffing until you like the shape, then secure the top.
Step 3: Shape the Pumpkin Ribs
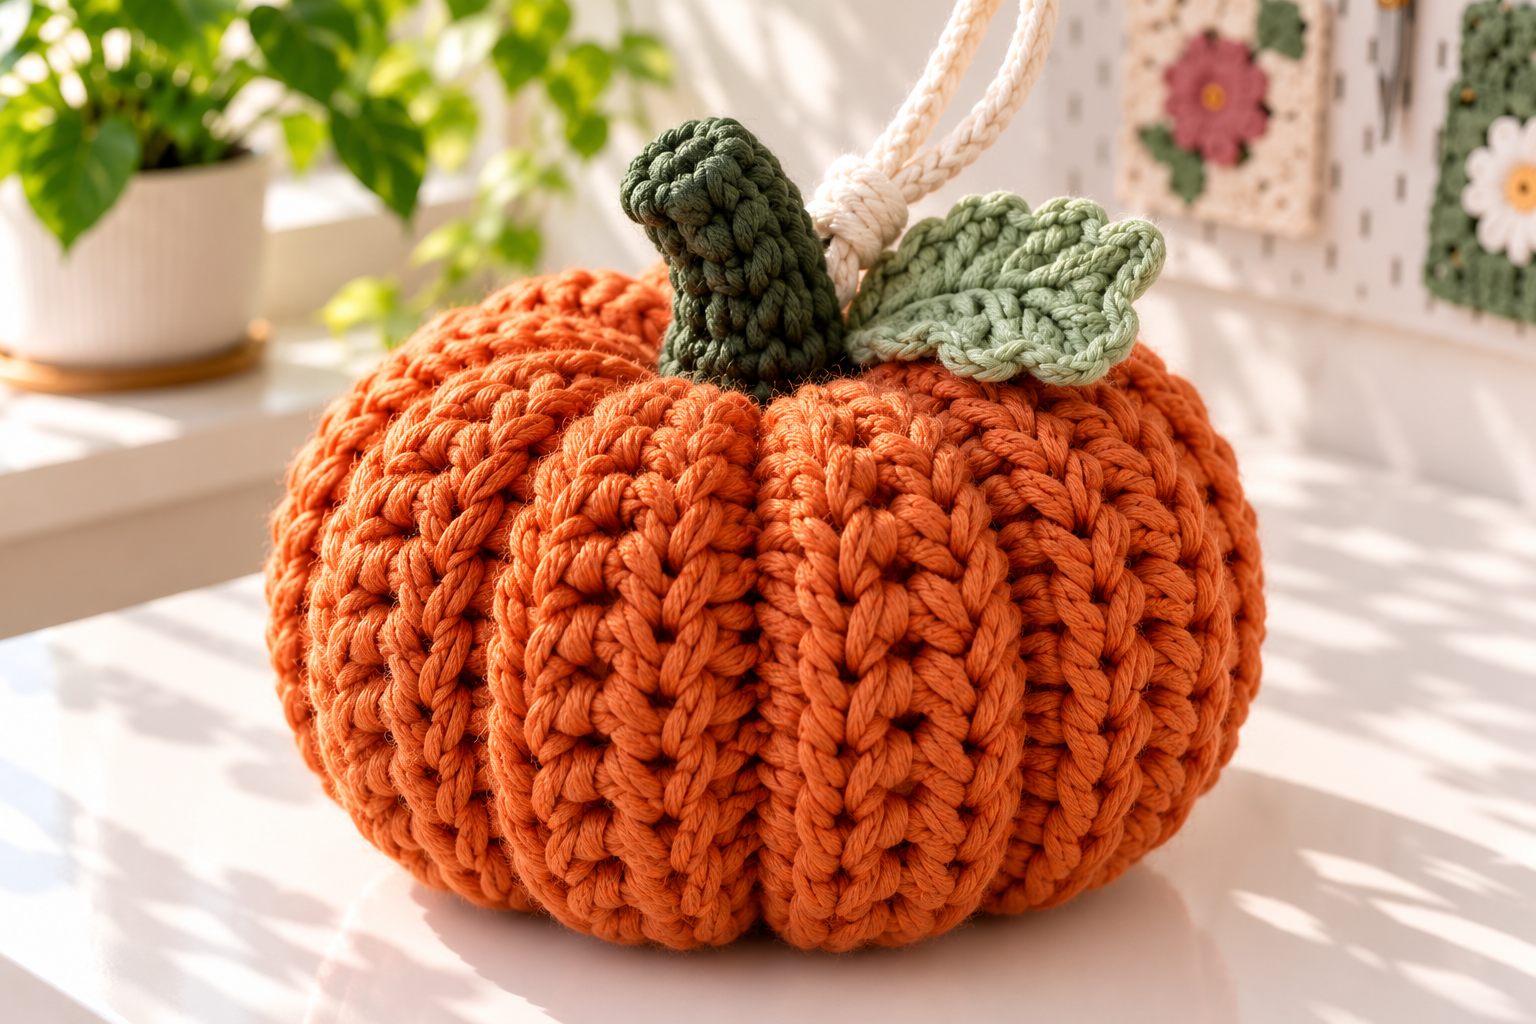
Cut a long piece of matching yarn and bring it from the bottom center to the top center. Wrap it around the outside of the pumpkin, returning through the center. Pull gently until a shallow groove appears. Repeat this process five more times, spacing the strands evenly around the pumpkin.
Do not pull so hard that the stitches pucker. The goal is six plump sections with a soft handmade look. Knot securely at the top, where the stem will hide the join.
Step 4: Add the Stem, Leaf, and Loop
For the stem, use brown or dark green yarn. Ch 7, sc in the second ch from the hook and across. Make two more rows of sc, then fasten off. Roll this tiny strip into a short stem and sew it to the top center.
For the leaf, ch 7 with green yarn. Beginning in the second chain, work sl st, sc, hdc, dc, hdc, sc. Continue along the opposite side of the foundation chain with sc, hdc, dc, hdc, sc, sl st. Fasten off and stitch the leaf beside the stem.
To create a hanger, ch 45–60 with cream yarn or use a short cotton cord. Join the ends securely and sew the loop behind the stem. Use a shorter loop for a bag charm and a longer one for a wall hook or garland.
Color and Display Ideas
This little crochet pumpkin fits easily among other fall crochet patterns and Halloween crochet patterns. Use black and purple for a playful spooky look, or choose oatmeal, terracotta, and olive for understated holiday crochet decor. Variegated yarn adds color without extra sewing.
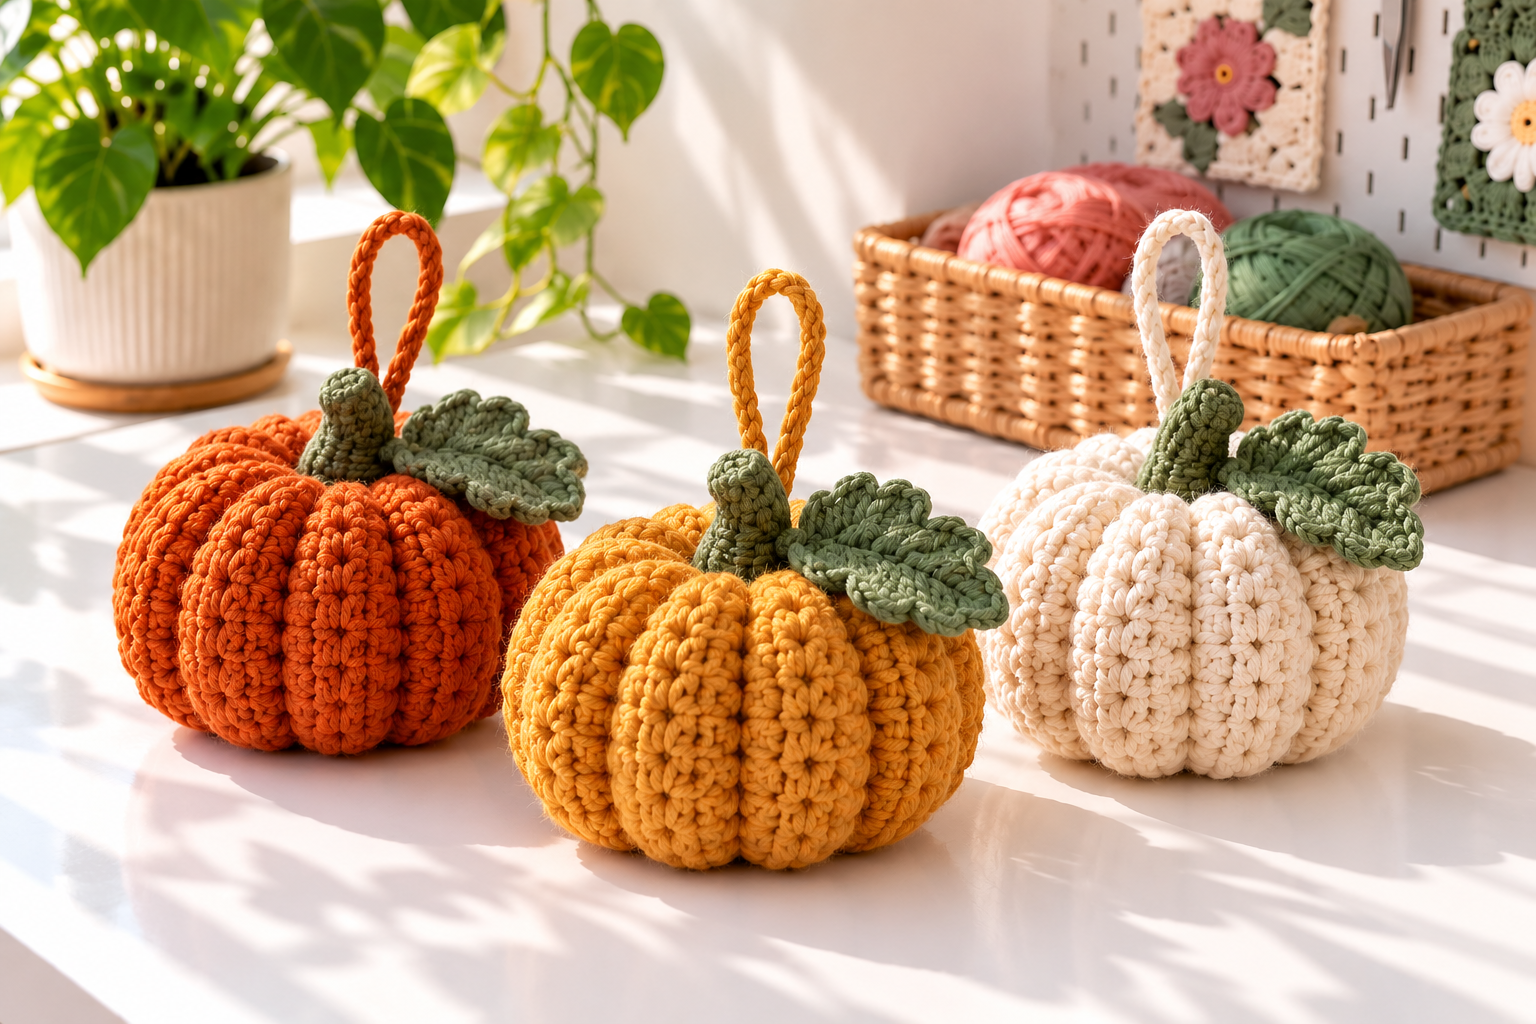
Join several pumpkins to a long chain for a mantel garland. A mini pumpkin also looks sweet beside seasonal gnome patterns, tied to a gift, or attached to a wreath. If you enjoy plushie patterns, embroider a simple face before stuffing to make a friendly pumpkin character. Avoid beads or buttons when the decoration may be handled by small children or pets.
Using It as a Crochet Car Charm
Mini pumpkins are popular Halloween car decorations, and the soft design works well as a lightweight crochet car accessory. Safety comes first: never hang it where it blocks the windshield or mirrors, touches the controls, interferes with an airbag, or distracts the driver. Check local rules, keep the loop short, and remove the charm if it swings into your field of view. A headrest hook or secured storage-area hook may be a better option than the rearview mirror.
Helpful Tips
- Count the rectangle rows so the ribbing stays even.
- Use a hook one size smaller if stuffing shows through.
- Stuff lightly for a flatter ornament and more firmly for a round crochet pumpkin.
- Weave every tail through several stitches before trimming.
- Steam-block only the leaf; pressing the stuffed pumpkin may flatten its texture.
For a smaller ornament, begin with 13 chains and crochet about 18 rows. For a fuller table decoration, start with 21 chains and continue until the rectangle wraps into a comfortably loose tube. Keep the same construction steps and adjust the amount of stuffing to suit the new size. This simple sizing method makes the design useful for gift toppers, garlands, and coordinated home accents.
A Quick Handmade Pumpkin Theme
Because the body is just a ribbed rectangle, these crochet pumpkin Halloween decorations are approachable for confident beginners and satisfying for experienced crocheters. The pattern is quick to customize, uses small yarn amounts, and works in many settings. Crochet one for a subtle autumn accent or make a colorful patch for a complete handmade pumpkin theme.