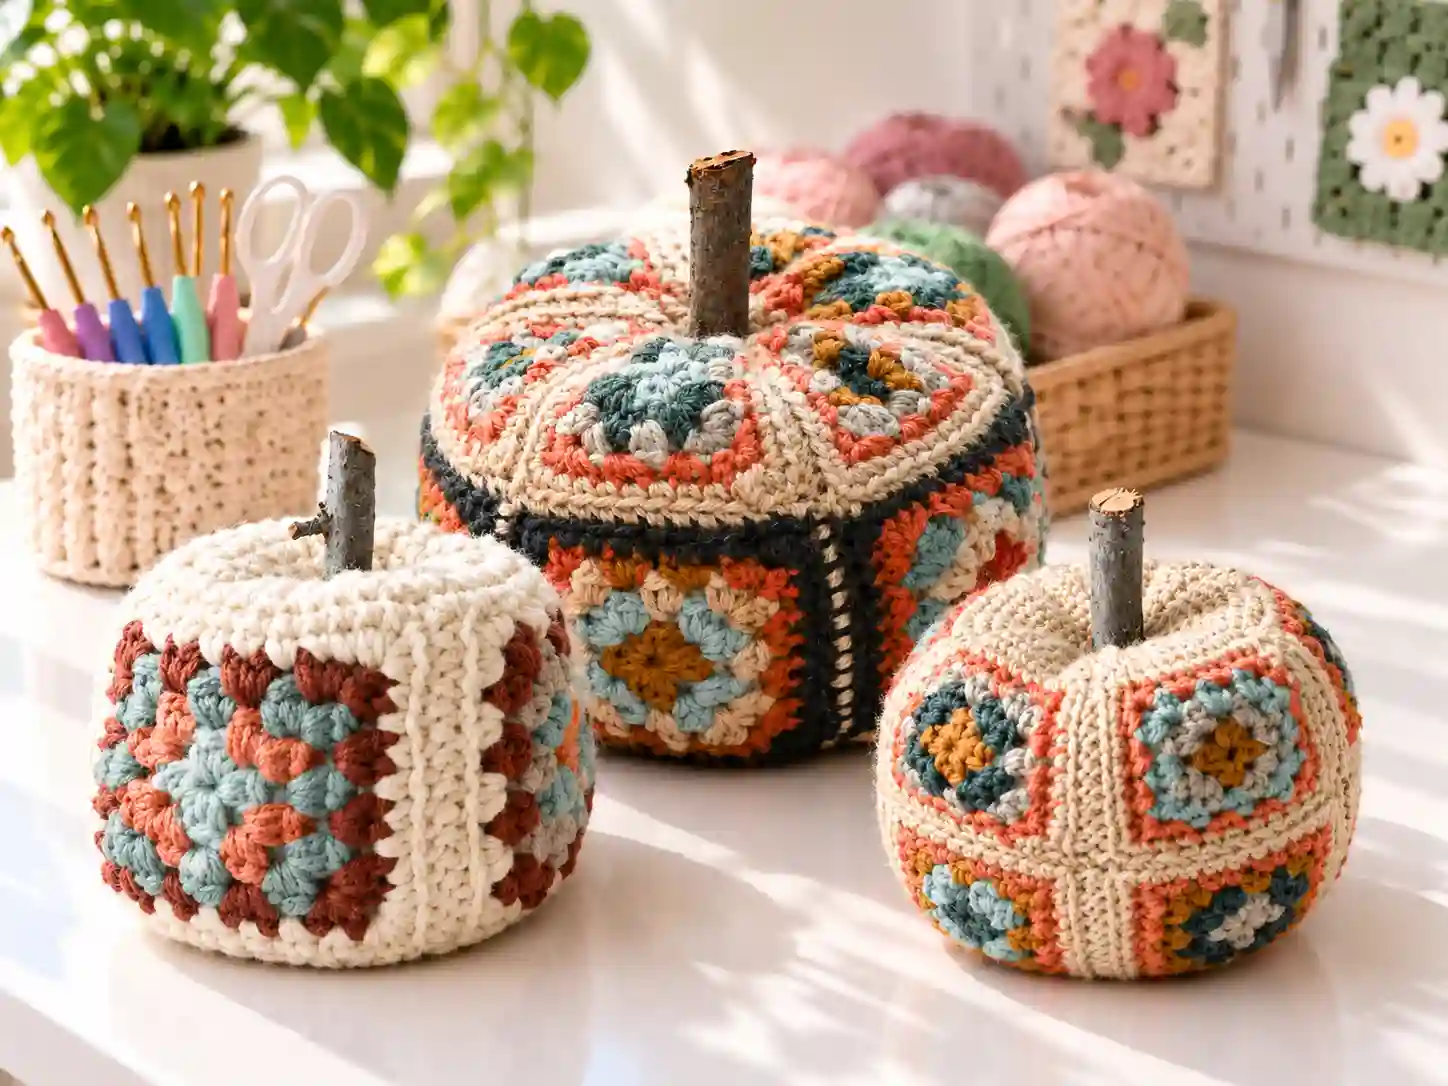
Cute granny square pumpkins bring together two much-loved crochet ideas: the familiar granny square and the soft, rounded shape of an autumn pumpkin. Instead of working a pumpkin in continuous rounds, you make textured squares, join them into a tube, gather the top and bottom, and add a simple stem. The result looks detailed and vintage-inspired, but the construction is refreshingly straightforward.
These pumpkins work especially well as seasonal décor because the granny-stitch texture gives them a handmade, quilt-like appearance. Use traditional orange and cream for a classic fall look, or experiment with muted sage, dusty rose, mustard, and deep burgundy for a more modern display. They also make thoughtful hostess gifts, table accents, and small thank-you presents during the autumn season.
Why You’ll Love This Crochet Project
- The granny-square construction creates plenty of visual interest without complicated colorwork.
- It is a great way to use small amounts of leftover yarn in coordinating colors.
- The project is portable: squares are easy to crochet on the go, then assemble at home.
- You can change the yarn weight to make a delicate mini pumpkin or a chunky statement piece.
- Finished pumpkins suit mantels, shelves, entryway tables, Thanksgiving centerpieces, and gift baskets.
Finished Size
No finished measurements were provided for this project. Because the pumpkins are made from granny squares and can be worked in different yarn weights, the final size will depend on the square size, the number of squares used, your tension, and how firmly you gather the top and bottom. A tighter fabric produces a firmer pumpkin, while a looser fabric creates a softer, more relaxed shape.
Materials You’ll Need
- Medium-weight yarn, or another yarn weight of your choice
- A 3.5 mm crochet hook, or a hook size that gives you a firm, tidy gauge
- Polyfil stuffing
- A darning needle
- A stick, small branch, or dowel for the stem
- River rocks or glass beads for optional weight
- Scissors
Yarn Information
Medium-weight yarn is a dependable choice for these pumpkins because it creates enough body for the squares to hold their shape after gathering. Cotton, acrylic, and wool-blend yarns can all work; choose a smooth or lightly textured yarn if you want the granny stitches to remain clearly visible.
The design is flexible with yarn choice. Finer yarn will create smaller, more delicate pumpkins, while bulky yarn produces a larger, chunkier finish. If you change yarn weight, adjust your hook size so the fabric feels dense rather than floppy. A small amount of stuffing, plus an optional weighted base, helps the pumpkin sit securely on a shelf or table.
Crochet Hook
A 3.5 mm hook is suggested for medium-weight yarn when a firm gauge is desired. If your squares feel loose or the stuffing shows through the stitches, go down a hook size. If the fabric feels stiff and difficult to work, try a slightly larger hook while keeping your tension even.
Crochet Abbreviations
This project uses standard US crochet terminology. The exact stitch abbreviations depend on the granny-square version you choose, but commonly used terms include:
- ch – chain
- sl st – slip stitch
- sc – single crochet
- dc – double crochet
- st(s) – stitch(es)
- sp – space
Pattern Notes
- The pumpkins are built from granny squares, which are typically worked in joined rounds from the center outward.
- Use a hook that gives you a firm fabric; a tight gauge helps prevent stuffing from showing between stitches.
- Make all squares for one pumpkin the same size before assembly.
- Block the squares lightly if they curl or sit unevenly, then allow them to dry completely before joining.
- Weave in ends as you finish each square so assembly feels less tedious later.
- The same granny-square design can be arranged in different layouts to create different pumpkin styles.
A complete round-by-round stitch pattern was not provided in the available project information, so no stitch counts or row-by-row instructions are included here. Use your preferred granny-square pattern, keeping the square count and finished square size consistent for each pumpkin.
Assembly
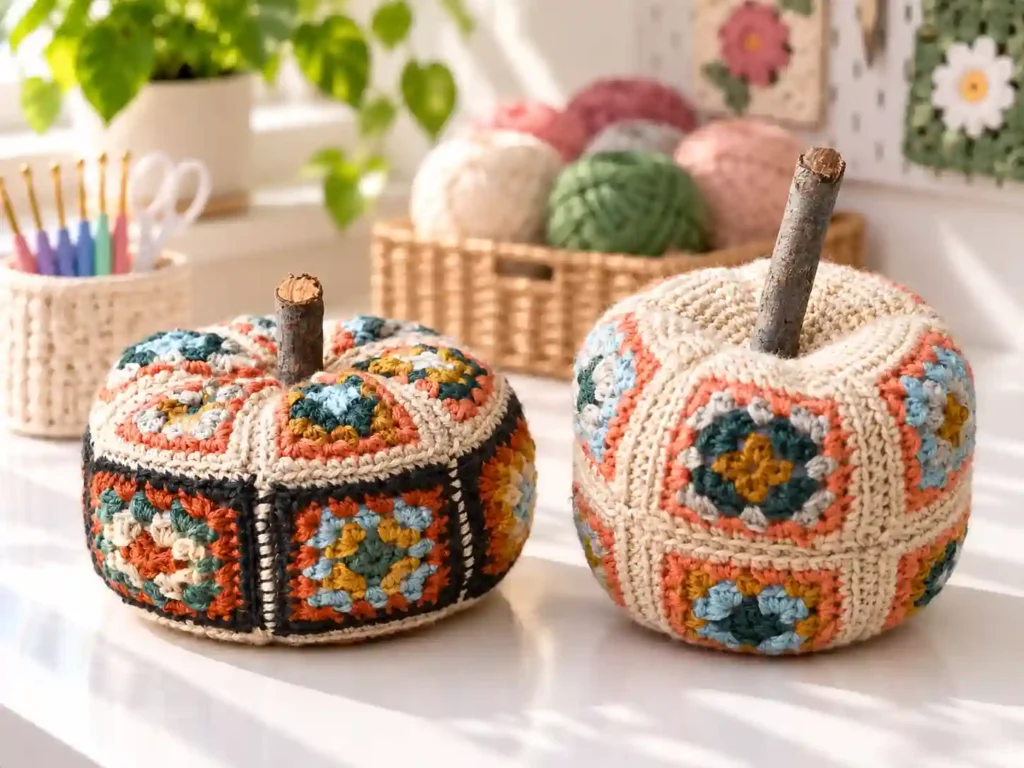
Once your squares are complete, arrange them side by side to decide on the color placement. Rotating the squares can change the overall look, especially when you use several contrasting colors. Lay them out before joining so the design feels balanced rather than accidental.
- Join the squares along one edge to form a long strip.
- Join the remaining short ends to create a tube, taking care to align the color pattern at the seam.
- Using a long yarn tail and a darning needle, sew a running stitch around the top opening.
- Add polyfil stuffing gradually, placing river rocks or glass beads at the base first if you want extra stability.
- Pull the top gathering thread snugly, close the opening securely, and fasten off.
- Repeat the gathering process at the bottom, then adjust the stuffing until the pumpkin looks full but not overstuffed.
Finishing Touches
Insert a small stick, branch, or dowel into the gathered top opening to form the stem. Secure it with a few stitches or a small dab of craft glue if needed. Fluff the stuffing gently from the outside to remove any lumps, then shape the pumpkin with your hands so the sides look rounded and even.
Weave in all remaining tails deeply inside the pumpkin, where they will not work loose with handling. If your squares were blocked before assembly, avoid soaking the finished pumpkin again; a light steam or careful reshaping is usually enough to tidy the final form.
Crochet Tips
- Keep your tension consistent across every square; uneven squares are much more noticeable once joined.
- Choose colors with clear contrast if you want the granny-square layout to stand out.
- Use a smaller hook than usual for amigurumi-style projects if your normal tension is relaxed.
- Stuff in small amounts. Overstuffing can stretch the granny stitches and make the seams visible.
- Add weight before the final stuffing so the pumpkin remains stable on a display surface.
- Try different square layouts before sewing; a simple rearrangement can completely change the finished look.
Variations
Color is the easiest way to personalize a granny square pumpkin. A two-color version looks crisp and traditional, while four or five colors create a scrappy, vintage feel. Neutral cream and beige squares with one bold accent color can make an elegant fall centerpiece.
You can also change the scale by using finer or bulkier yarn. A lightweight yarn version makes a sweet shelf ornament, while super-bulky yarn creates a substantial decorative pumpkin. Keep the hook size appropriate for the yarn so the finished fabric remains firm enough to support the stuffing.
Common Problems and Troubleshooting
The squares curl at the edges
Curling often happens when the center rounds are tighter than the outer rounds. Try blocking the finished squares flat, pinning them into shape, and letting them dry before joining. Consistent tension on the outer rounds also helps the squares lie flat.
The pumpkin looks floppy
A loose fabric or too little stuffing can make the pumpkin lose its shape. Use a smaller hook, work with firmer tension, and add stuffing gradually until the pumpkin holds a rounded form. A weighted base can also improve stability.
The squares do not match in size
Check your stitch count after every round and compare each square before fastening off. Small differences can usually be eased during joining, but squares that differ noticeably should be remade or carefully blocked to a matching measurement.
How to Use the Finished Crochet Project
- Style a group of three pumpkins on a mantel or console table.
- Use one as a Thanksgiving table centerpiece alongside candles or greenery.
- Place a small pumpkin on a bookshelf, desk, or entryway table.
- Add one to a fall gift basket with tea, a candle, or homemade treats.
- Make a set in coordinating colors for a cozy seasonal display.
Care Instructions
Spot-clean the finished pumpkin with a damp cloth and mild soap when needed, then allow it to air-dry completely. Avoid machine washing, especially if the pumpkin contains river rocks, glass beads, or a wooden stem. Store it in a dry place away from direct sunlight to help preserve the yarn colors, and reshape it gently after storage.
Frequently Asked Questions
Can a beginner make cute granny square pumpkins?
Yes, if you are comfortable making basic granny squares and sewing pieces together. The shaping comes from gathering the joined squares, so there is no complicated three-dimensional crochet construction.
What yarn works best?
Medium-weight yarn is a practical starting point because it creates a sturdy fabric. Smooth acrylic, cotton, or wool-blend yarns all show granny-stitch texture well.
Can I use a different hook size?
Yes. Choose a hook that produces a firm fabric for your chosen yarn. A tighter gauge helps the pumpkin keep its shape and prevents stuffing from showing through.
Can I make the pumpkin larger or smaller?
You can adjust the size by changing yarn weight, hook size, or the dimensions of your granny squares. Keep every square in one pumpkin the same size for the neatest result.
Do I need river rocks or glass beads?
They are optional. Adding a small weight at the base helps the pumpkin sit securely, but polyfil alone will work if you prefer a lighter decoration.
How do I keep the stuffing from showing?
Use a dense granny-square fabric, a smaller hook if needed, and white or color-matched stuffing. Stuff firmly but avoid stretching the stitches.
How should I clean the finished pumpkin?
Spot-clean only. Because the pumpkin contains stuffing and may include a wooden stem or weighted base, submerging it in water is not recommended.
Conclusion
Cute granny square pumpkins are a satisfying way to turn simple squares into a charming handmade decoration. Play with warm autumn shades, muted modern tones, or leftover yarn from your stash, then arrange a few together for an instant seasonal display. Once you make one, it is hard not to start planning a whole little pumpkin patch.