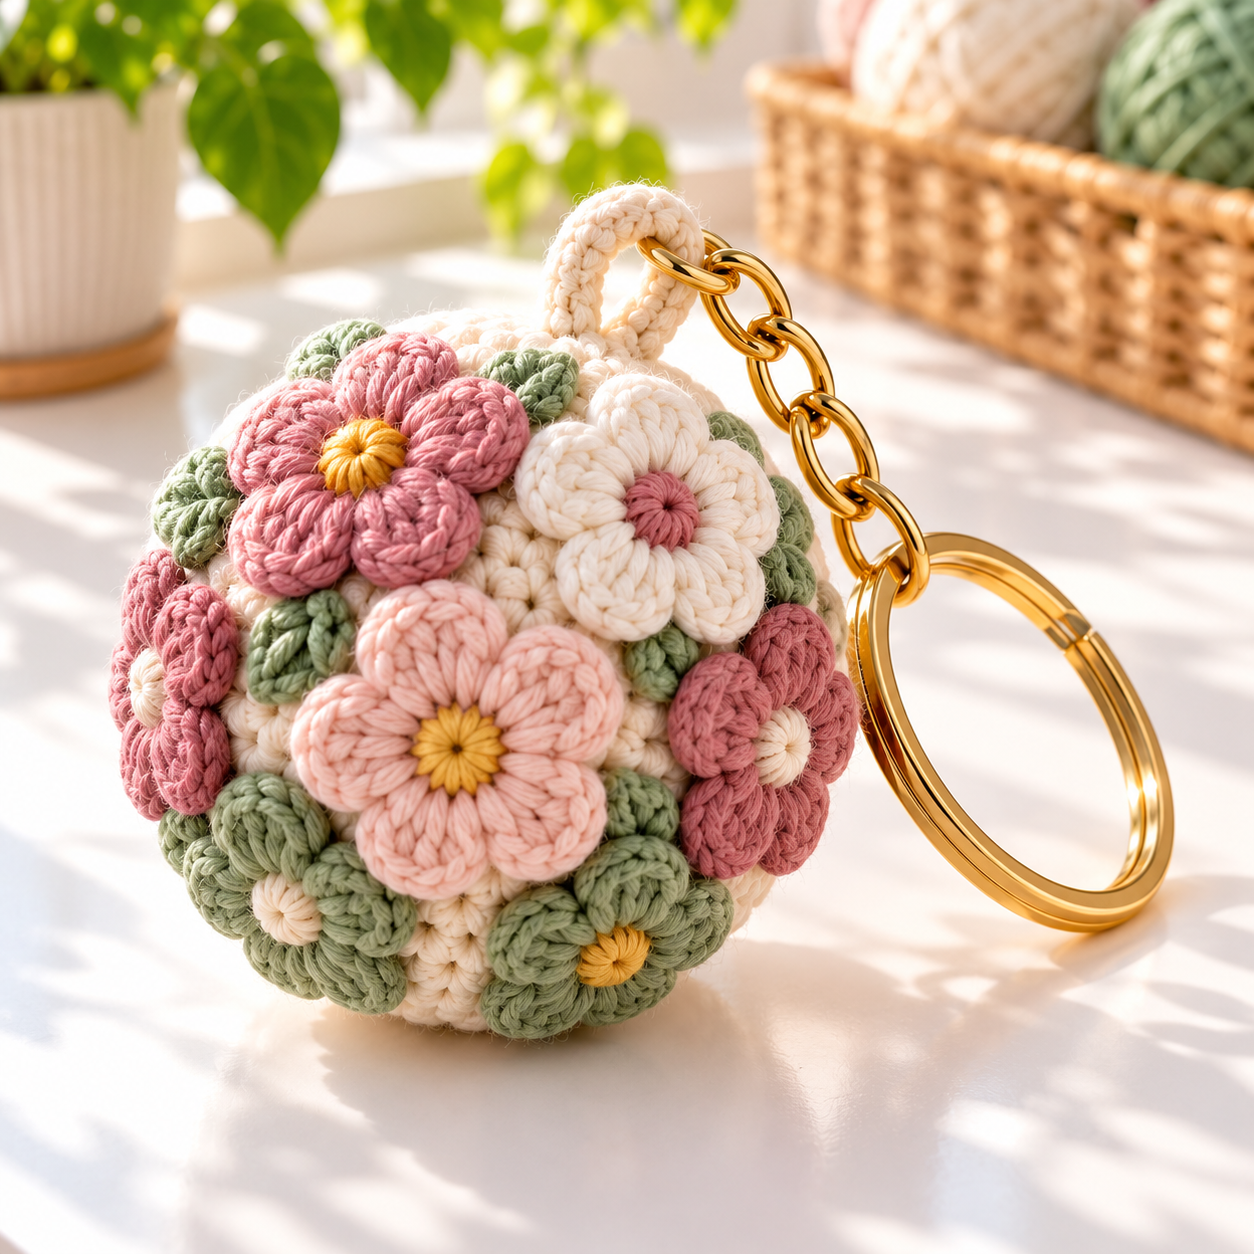
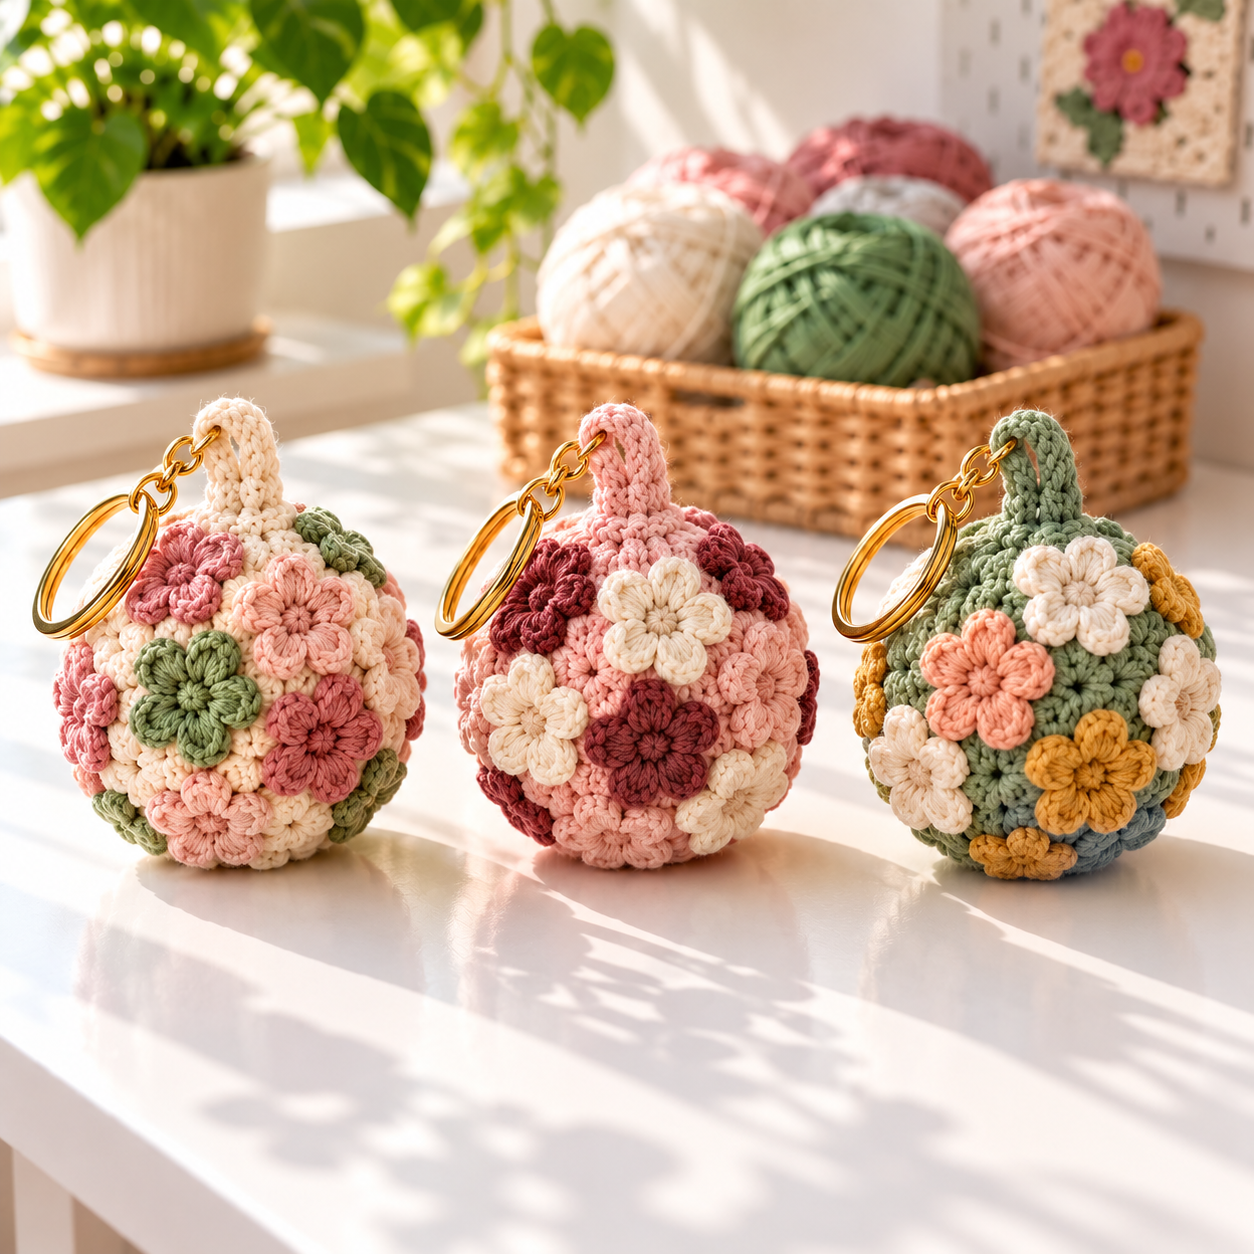
A Flower Ball Keychain turns a handful of yarn scraps into a soft, cheerful accessory for keys, bags, or a handmade gift. This beginner-friendly design starts with one simple crochet sphere, then adds tiny five-petal flowers in your favorite colors. The separate base makes the charm sturdy and keeps the flower placement easy to control, even if this is your first small amigurumi-style project.
The finished ball is about 3 inches (7.5 cm) wide when made with DK or light worsted cotton yarn and a 3.25 mm hook. Gauge is not critical, but your stitches should be tight enough to hide the stuffing.
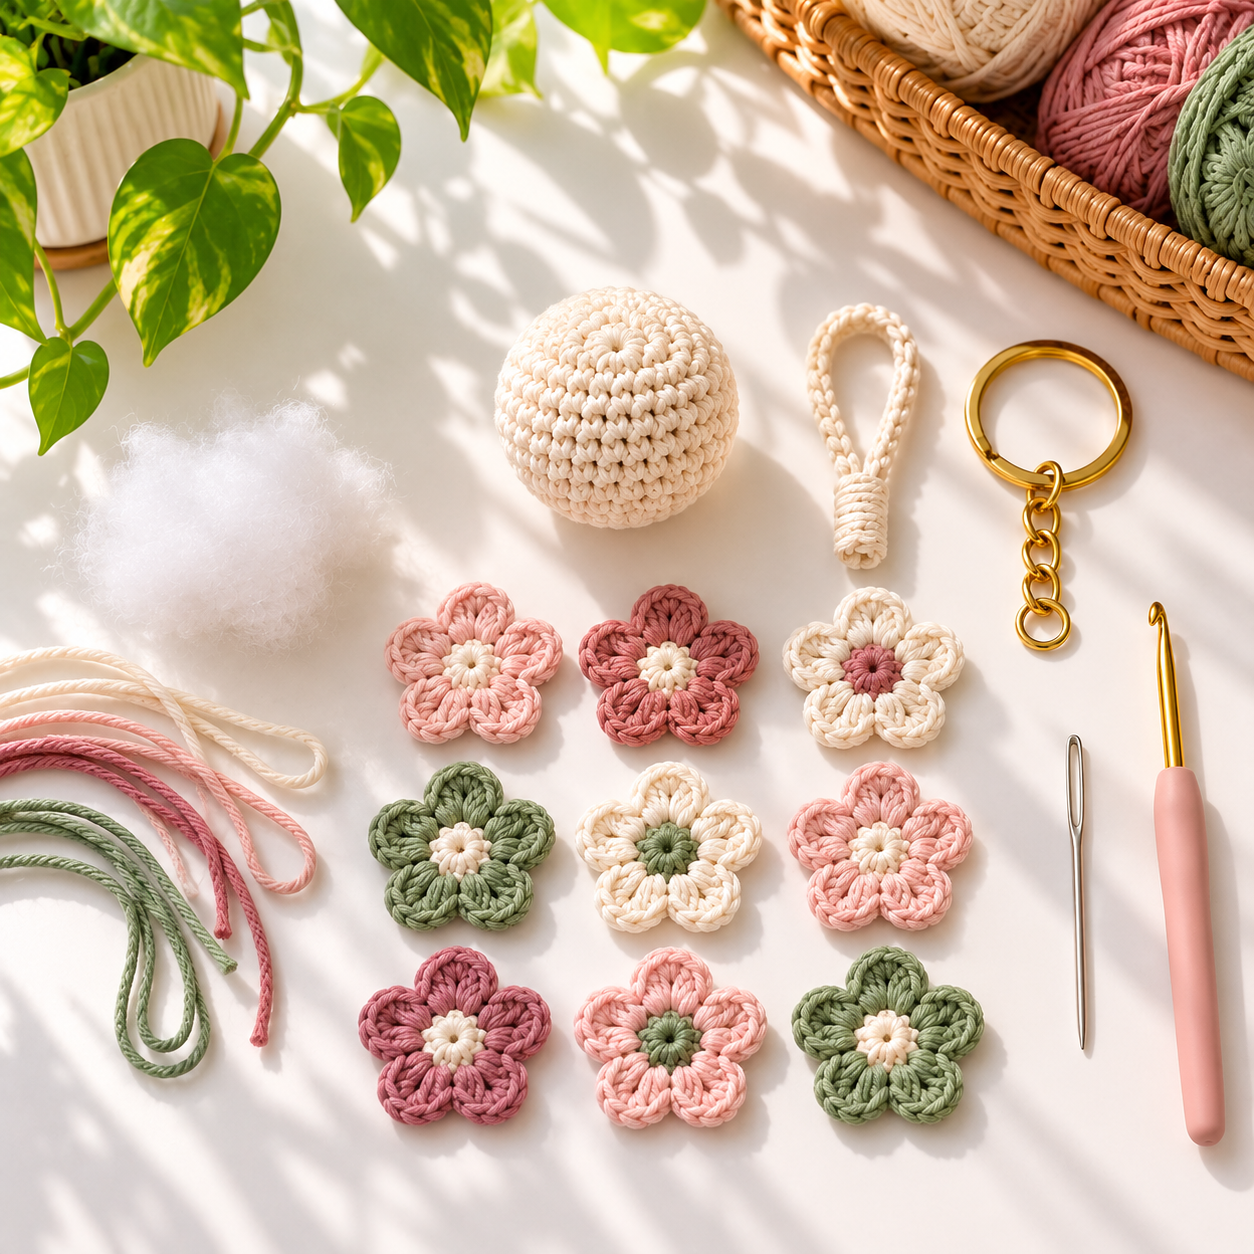
Materials for the Flower Ball Keychain
- DK or light worsted cotton yarn in cream for the ball
- Small scraps in blush, dusty rose, sage, or other flower colors
- 3.25 mm crochet hook
- Polyester stuffing
- Yarn needle, scissors, and stitch marker
- Split key ring, lobster clasp, or swivel clasp
- Optional sewing pins for arranging the flowers
This is one of those Easy Crochet Projects that works especially well for leftover yarn. Cotton gives the flowers crisp edges, while acrylic makes a slightly softer, puffier charm. Use the same yarn weight throughout so every motif looks balanced.
Abbreviations
- ch: chain
- sc: single crochet
- dc: double crochet
- sl st: slip stitch
- inc: work 2 single crochet stitches in one stitch
- dec: single crochet 2 stitches together
- MR: magic ring
Work the ball in continuous rounds. Place a marker in the first stitch and move it up after every round. The numbers in parentheses show the stitch count.
Step 1: Crochet the Ball
- Round 1: Make 6 sc in an MR. (6)
- Round 2: Inc in every stitch around. (12)
- Round 3: [Sc, inc] 6 times. (18)
- Round 4: [Sc in next 2 stitches, inc] 6 times. (24)
- Rounds 5–8: Sc in every stitch around. (24)
- Round 9: [Sc in next 2 stitches, dec] 6 times. (18)
- Round 10: [Sc, dec] 6 times. (12)
Stuff firmly but do not stretch the stitches. Add small pieces of filling at a time and shape the work into an even sphere.
- Round 11: Dec around. (6)
Fasten off with a long tail. Thread the tail through the front loops of the remaining stitches, pull the opening closed, and weave it securely through the ball.
Step 2: Make the Tiny Flowers
Make nine flowers, or enough to give your ball the coverage you like. For each Flower Ball motif, form an MR. Repeat the following petal five times: [ch 2, 2 dc into the ring, ch 2, sl st into the ring]. Pull the ring closed and leave a tail about 8 inches long for sewing.
Change colors from flower to flower for a playful scrap-yarn look. For a contrasting center, use a short piece of yarn to add a French knot or two small straight stitches after the flower is attached. These tiny motifs also make useful Crochet Embellishments for hats, pouches, and headbands.
Step 3: Add a Reinforced Hanging Loop
Make the attachment before covering the ball with flowers. Chain 22, then slip stitch back through every chain to create a firm cord. Thread the cord through the split ring or clasp, fold it in half, and sew both ends deeply into the top of the ball.
Pass the needle through several different stitches and make multiple secure passes. Tug the ring gently to test it. The top flowers will hide the join, but they should never be the only pieces holding the hardware in place.

Step 4: Arrange and Sew the Flowers
Pin the flowers in place before sewing. Start with four evenly spaced around the widest part of the sphere. Add two above that row, two below it, and one near the bottom. Leave enough space around the hanging loop so the clasp can move freely.
Use each flower tail to stitch through the center and the base of every petal. Pull the thread just firmly enough to follow the curve of the ball; pulling too tightly can flatten the petals. Carry the tail through the stuffing before trimming it so the end stays hidden. Adjust the arrangement as you go and add another flower if a large gap remains.
Finishing Tips for a Neat Result
- Keep the sphere stitches tight and consistent so no filling shows.
- Block only the loose flowers if needed; do not soak the stuffed ball.
- Mix light, medium, and dark shades to make separate petals easy to see.
- Use smaller flowers near the top if the clasp feels crowded.
- Check every sewn join by gently pulling each motif.
If you are beginning to Learn To Crochet, practice one flower in spare yarn first. The repeated chain, double crochet, and slip stitch sequence is an Easy Tutorial for learning how different stitch heights create a shaped petal.
More Ways to Use the Mini Flowers
Do not throw away extra motifs. Sew a pair onto Easy Crochet Slippers for a coordinated gift, or use them to personalize a favorite Crochet Slipper Pattern. If you add flowers to any Slippers Pattern, place them on the toe or upper edge—not on the sole—and stitch each petal securely so it cannot catch while walking.
The same embellishments can decorate zipper pulls, bookmarks, gift wrapping, or a plain crochet pouch. For a smaller keychain, make the ball with sport-weight yarn and a hook one size smaller. For a fuller floral look, overlap the flowers slightly and use more than nine.
Ideas for a Handmade Business
This compact project can be a practical addition to a Handmade Business because it is easy to batch. Crochet several neutral balls first, prepare piles of flowers by color palette, and assemble them together. Seasonal sets—spring pastels, autumn rust and gold, or winter red and cream—make an attractive craft-fair display.
When pricing, include yarn, hardware, stuffing, packaging, and your full working time. Keep notes on yarn brand, hook size, flower count, and finished measurements so repeat orders stay consistent. Test the loop and clasp on every piece, provide care instructions, and clearly label the fiber content.
Care and Safety
Spot-clean the charm with cool water and mild soap, reshape it, and let it air-dry completely. This keychain is a decorative accessory, not a toy. The metal ring and sewn-on parts can be choking hazards, so keep it away from babies and pets. Inspect the loop and flowers regularly, especially when the charm is used on a bag.
Your finished Flower Ball Keychain should feel light, colorful, and pleasantly textured. Once you understand the sphere and five-petal motif, changing the palette is all it takes to create a completely different gift.